In this article we are going to create an IVR that routes the call to an agent with the correct skill to handle that call. What is an IVR? IVR stands for Interactive Voice Response. When you call your bank and an automated voice says: Press 1 to hear your balance, press 2 if you lost your card… And then you press a key to get in contact with the correct person, that is an IVR! We are going to build out very own, that when you press 1 it routes you to a skill and when you press 2 it routes you to another skill. And to do so, we are going to use a couple of Twilio products:
- Twilio Studio: graphical interphase to build IVRs
- Twilio Taskrouter: Twilio engine that routes calls to the right agent
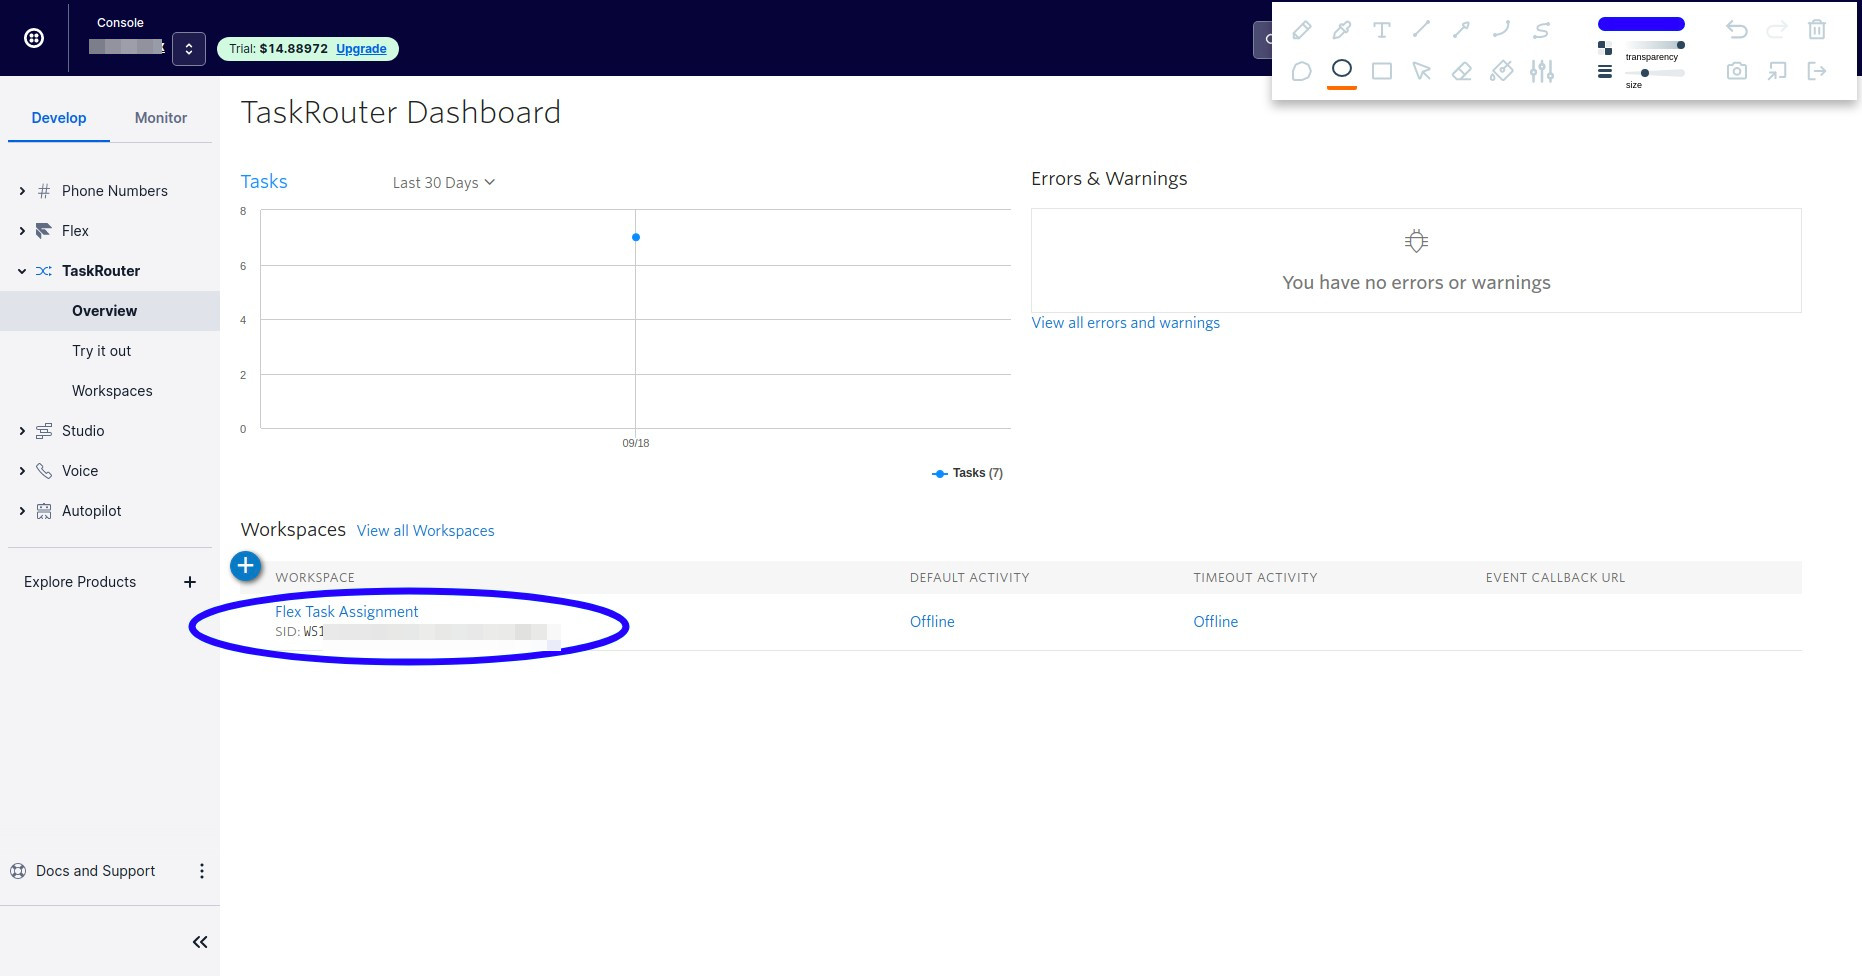
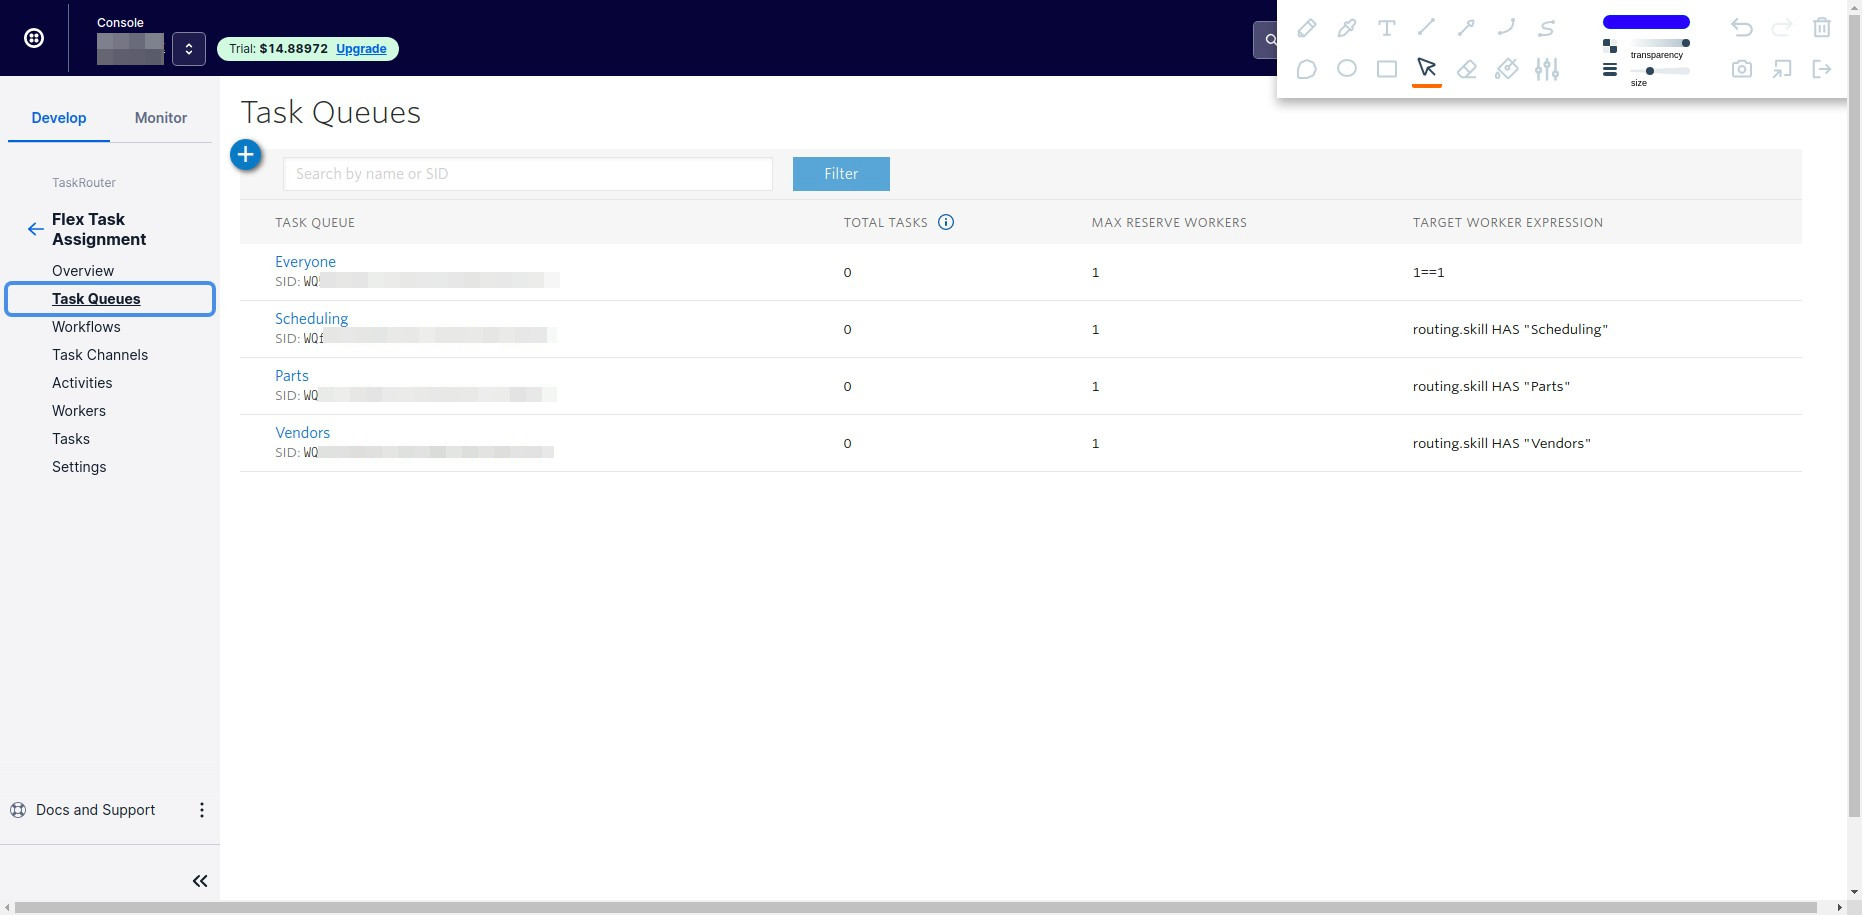
To start, lets go to Twilio Taskrouter, and click on Flex Tax Assignment
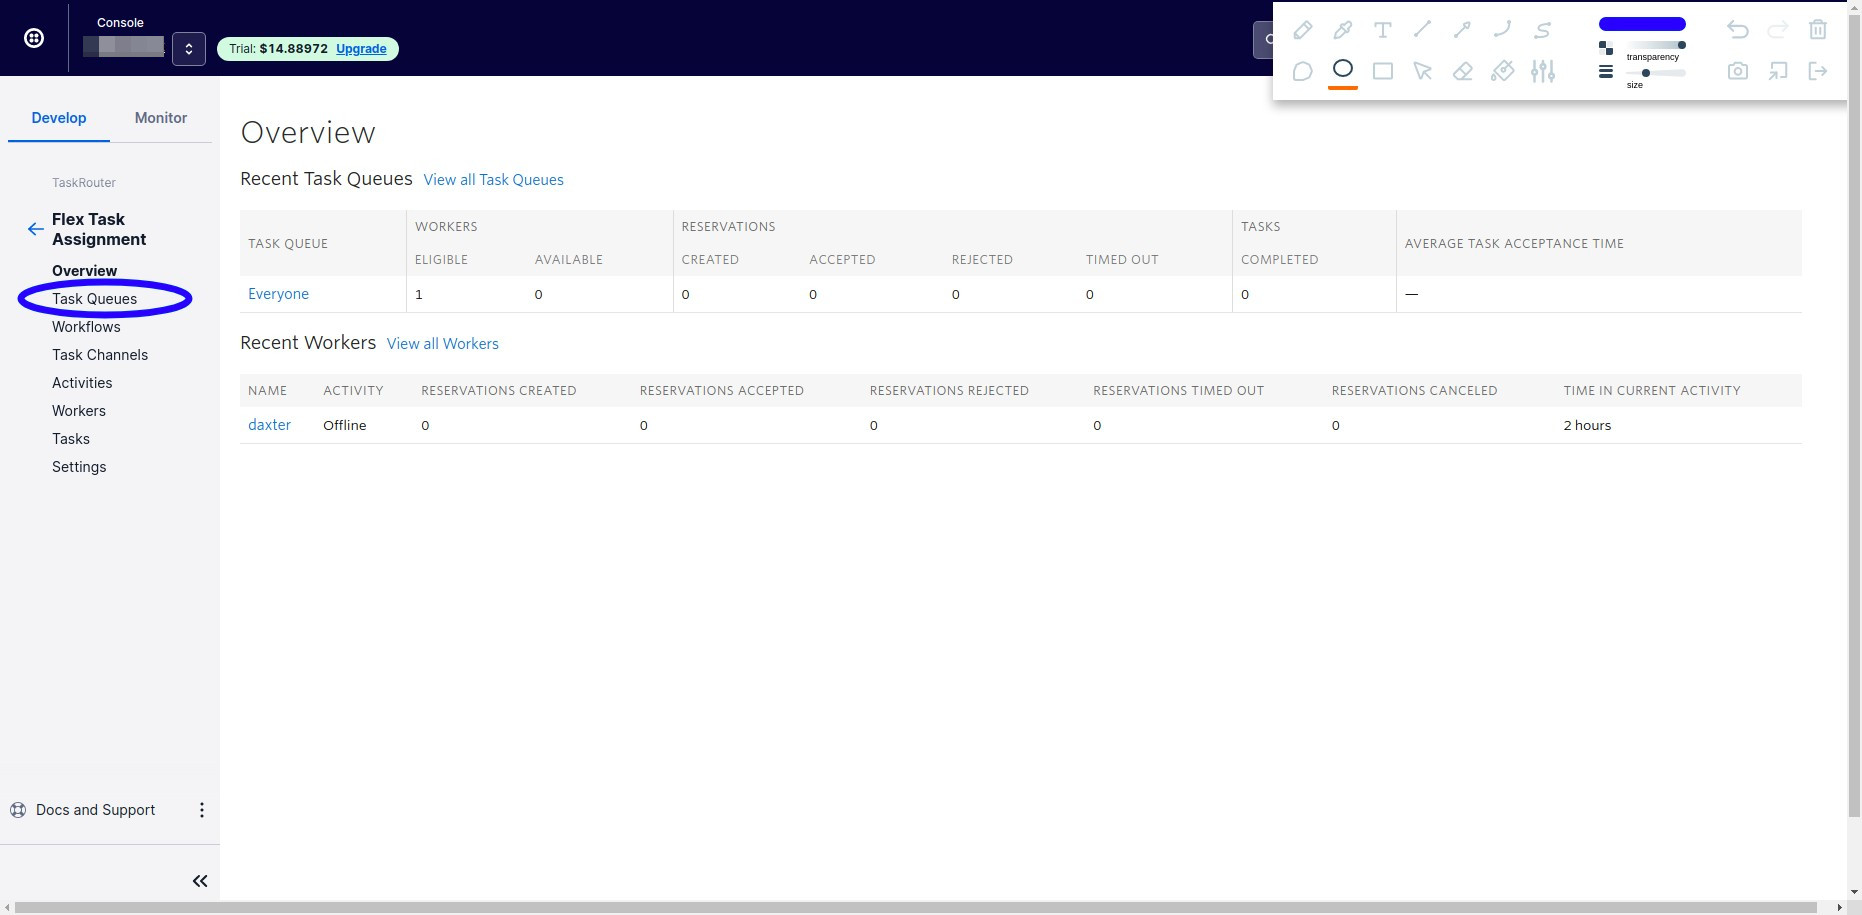
Inside of the Taskrouter click on Task Queues
Let’s talk about what we are building in this example. We are going to build an IVR that when called, it says:
Thank you for calling.
- Press 1 for Scheduling
- Press 2 for Parts
- Press 3 for Vendors
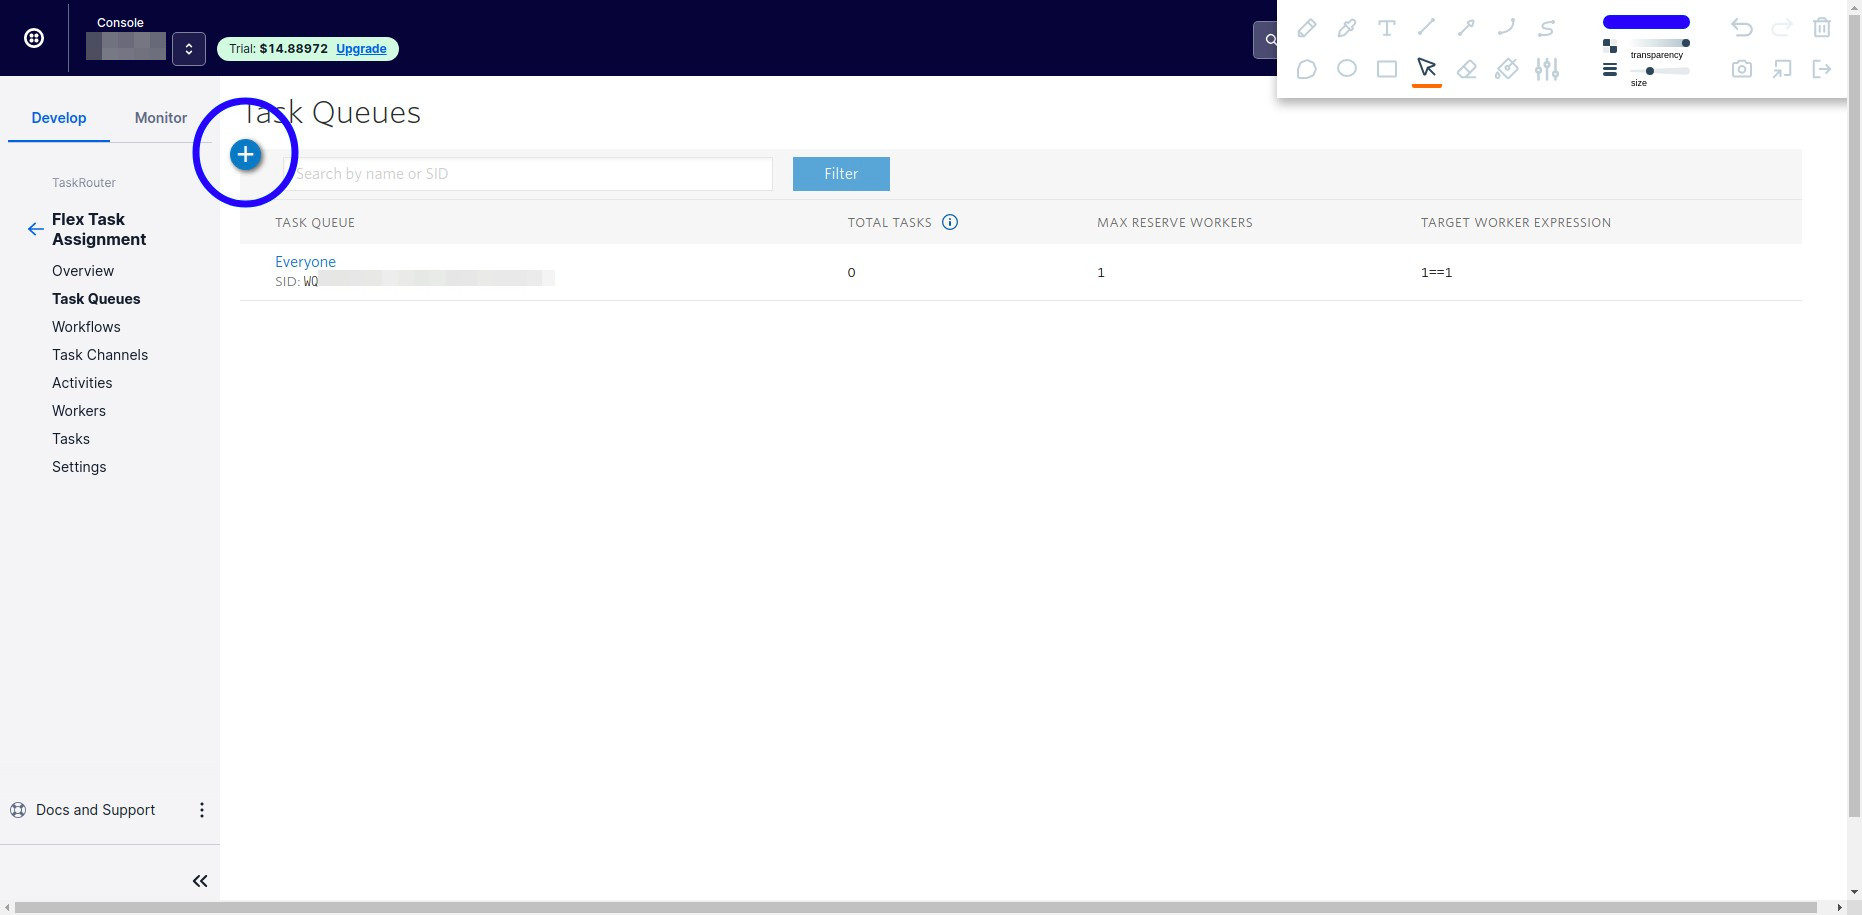
Flex comes with 1 Task Queue that says everyone. When we create a task in this queue it goes to… everyone. We are going to create 3 additional Task Queues, and when a task is created in each of these task queues is going to route to an agent with the proper skill to handle our call. The skills we are going to create are:
- Scheduling
- Parts
- Vendors
Create a task queue by pressing the + button
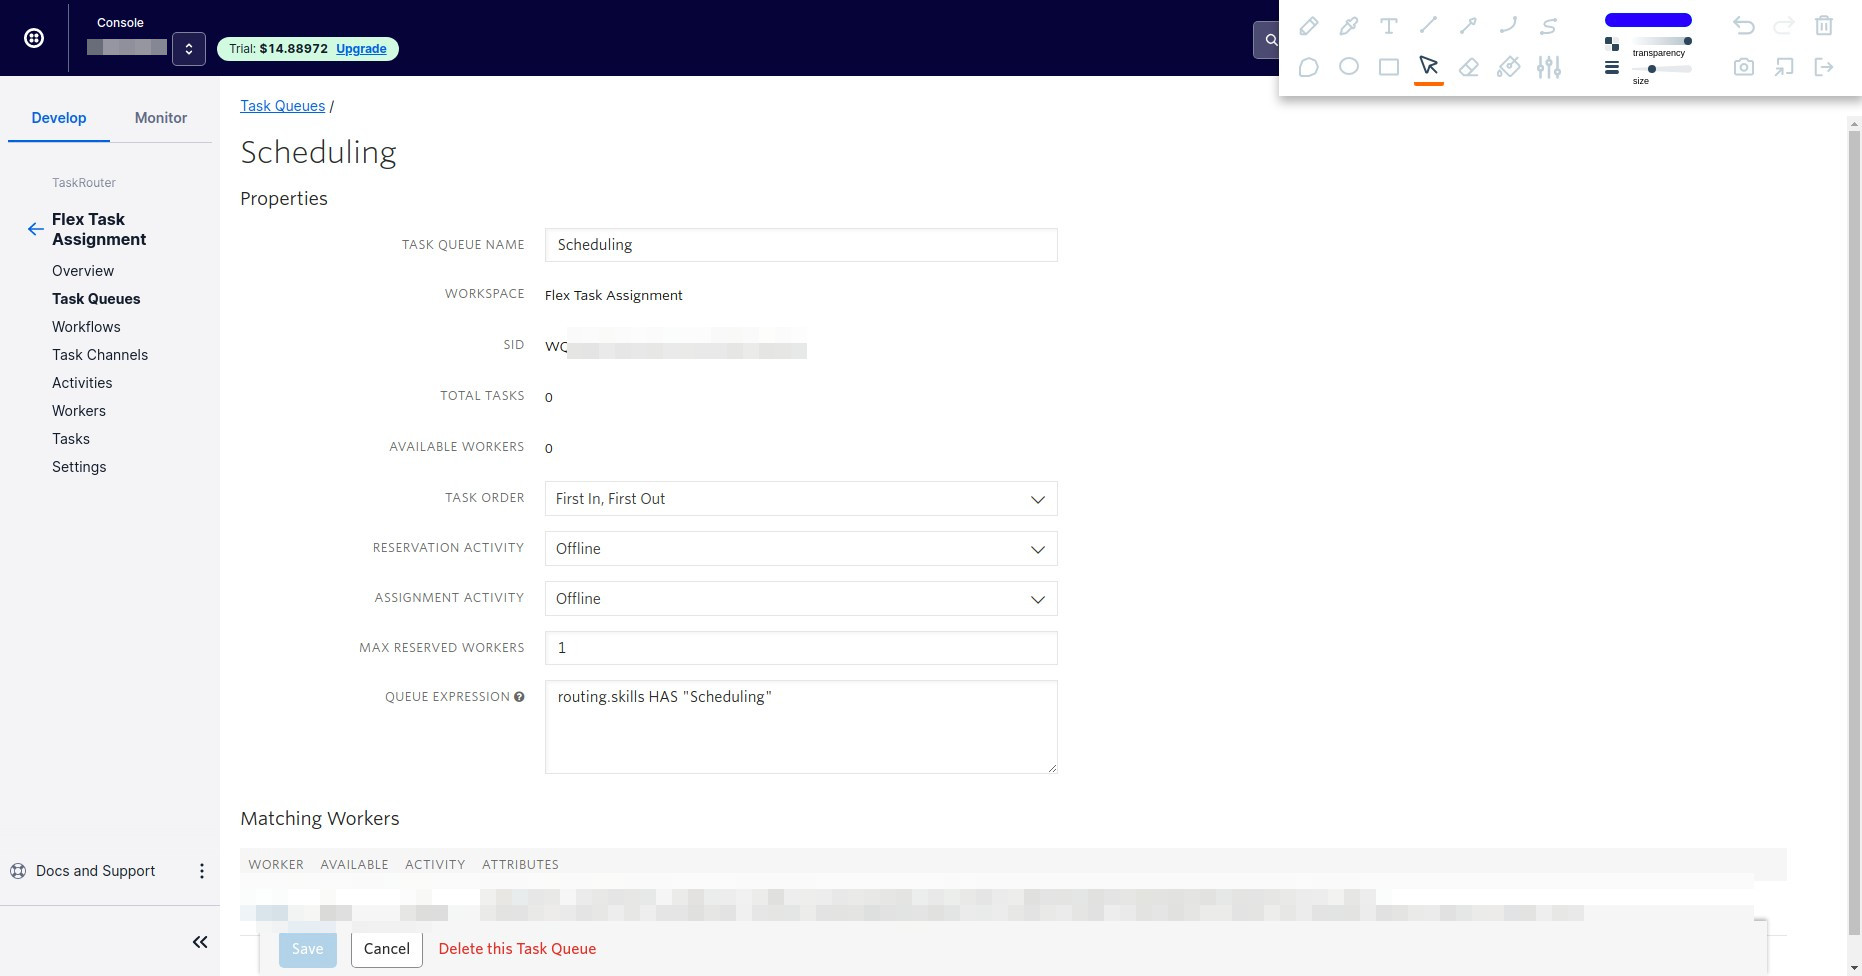
Now we are going to fill the form:
- Task Queue name: Scheduling
- Workspace: Flex Task Assignment
- Task Order: First In, First Out
- Reservation Activity: Offline
- Assignment Activity: Offline
- Max Reserved Workers: 1
- Queue Expression: routing.skills HAS “Scheduling”
Click on task queues on the left hand side and create 2 more task queues, one for parts and one for vendors:
Parts Task Queue:
- Task Queue name: Parts
- Workspace: Flex Task Assignment
- Task Order: First In, First Out
- Reservation Activity: Offline
- Assignment Activity: Offline
- Max Reserved Workers: 1
- Queue Expression: routing.skills HAS “Parts”
Vendors:
- Task Queue name: Vendors
- Workspace: Flex Task Assignment
- Task Order: First In, First Out
- Reservation Activity: Offline
- Assignment Activity: Offline
- Max Reserved Workers: 1
- Queue Expression: routing.skills HAS “Vendors”
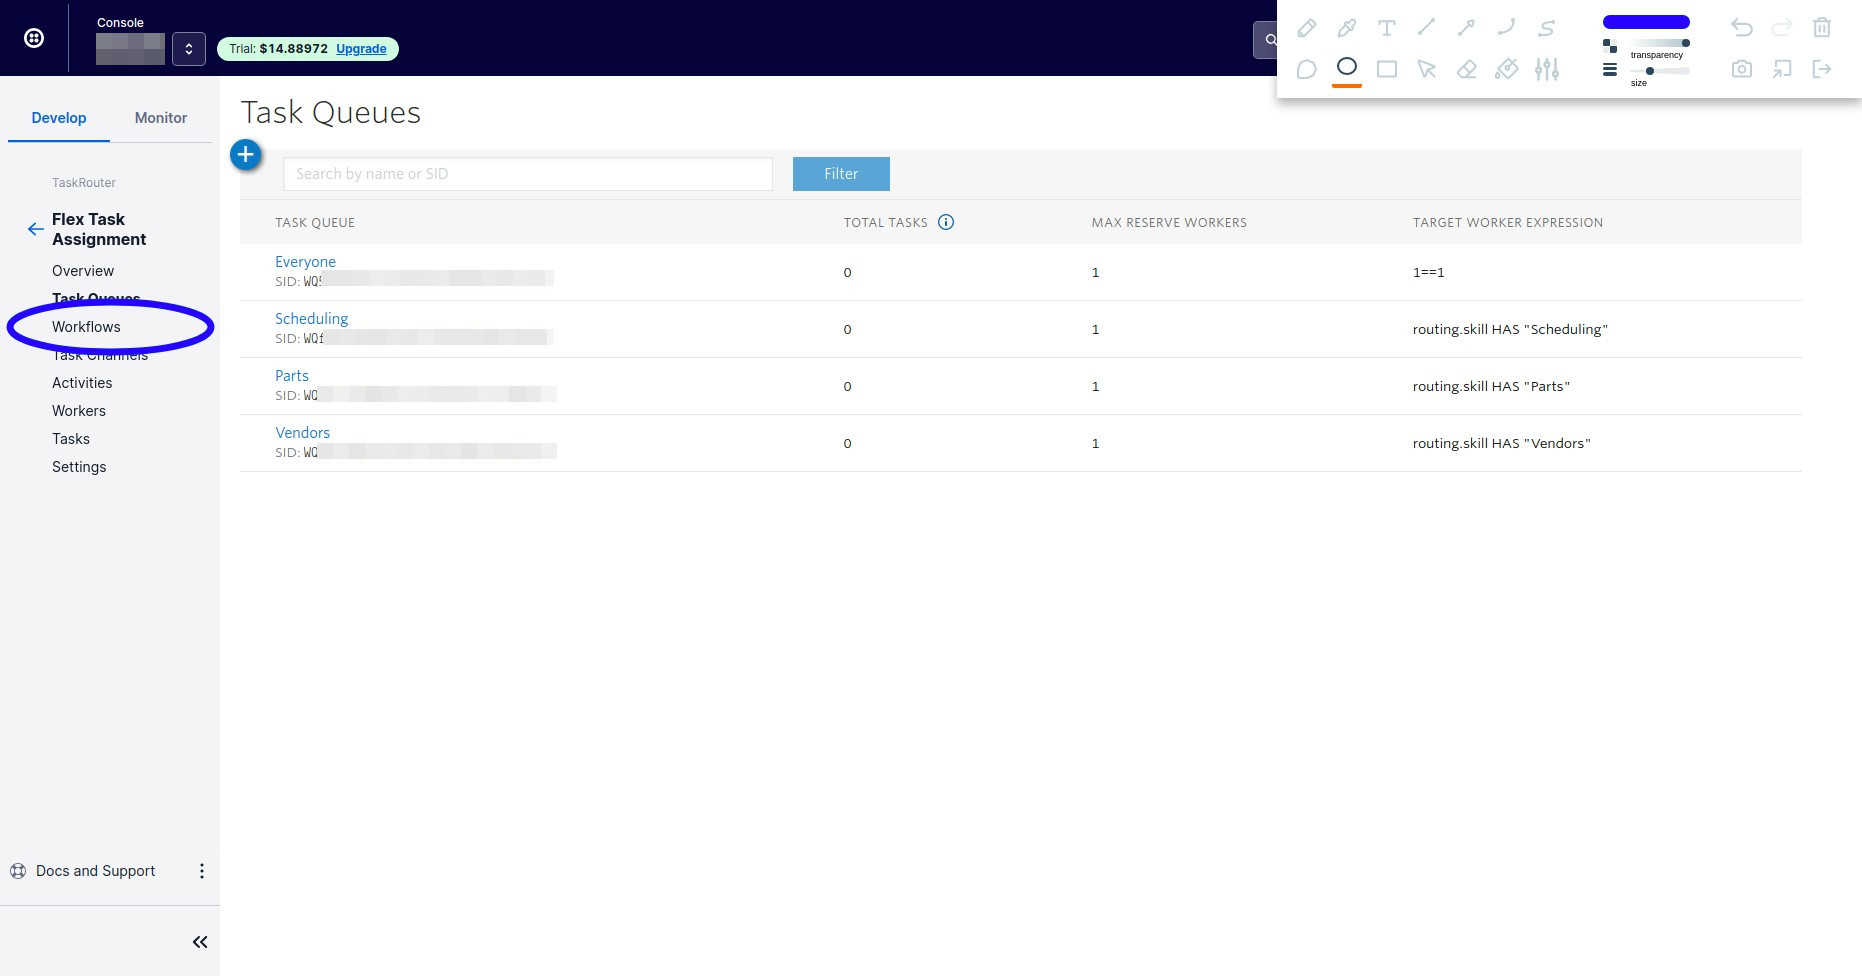
Now you should have a total of 4 queues:
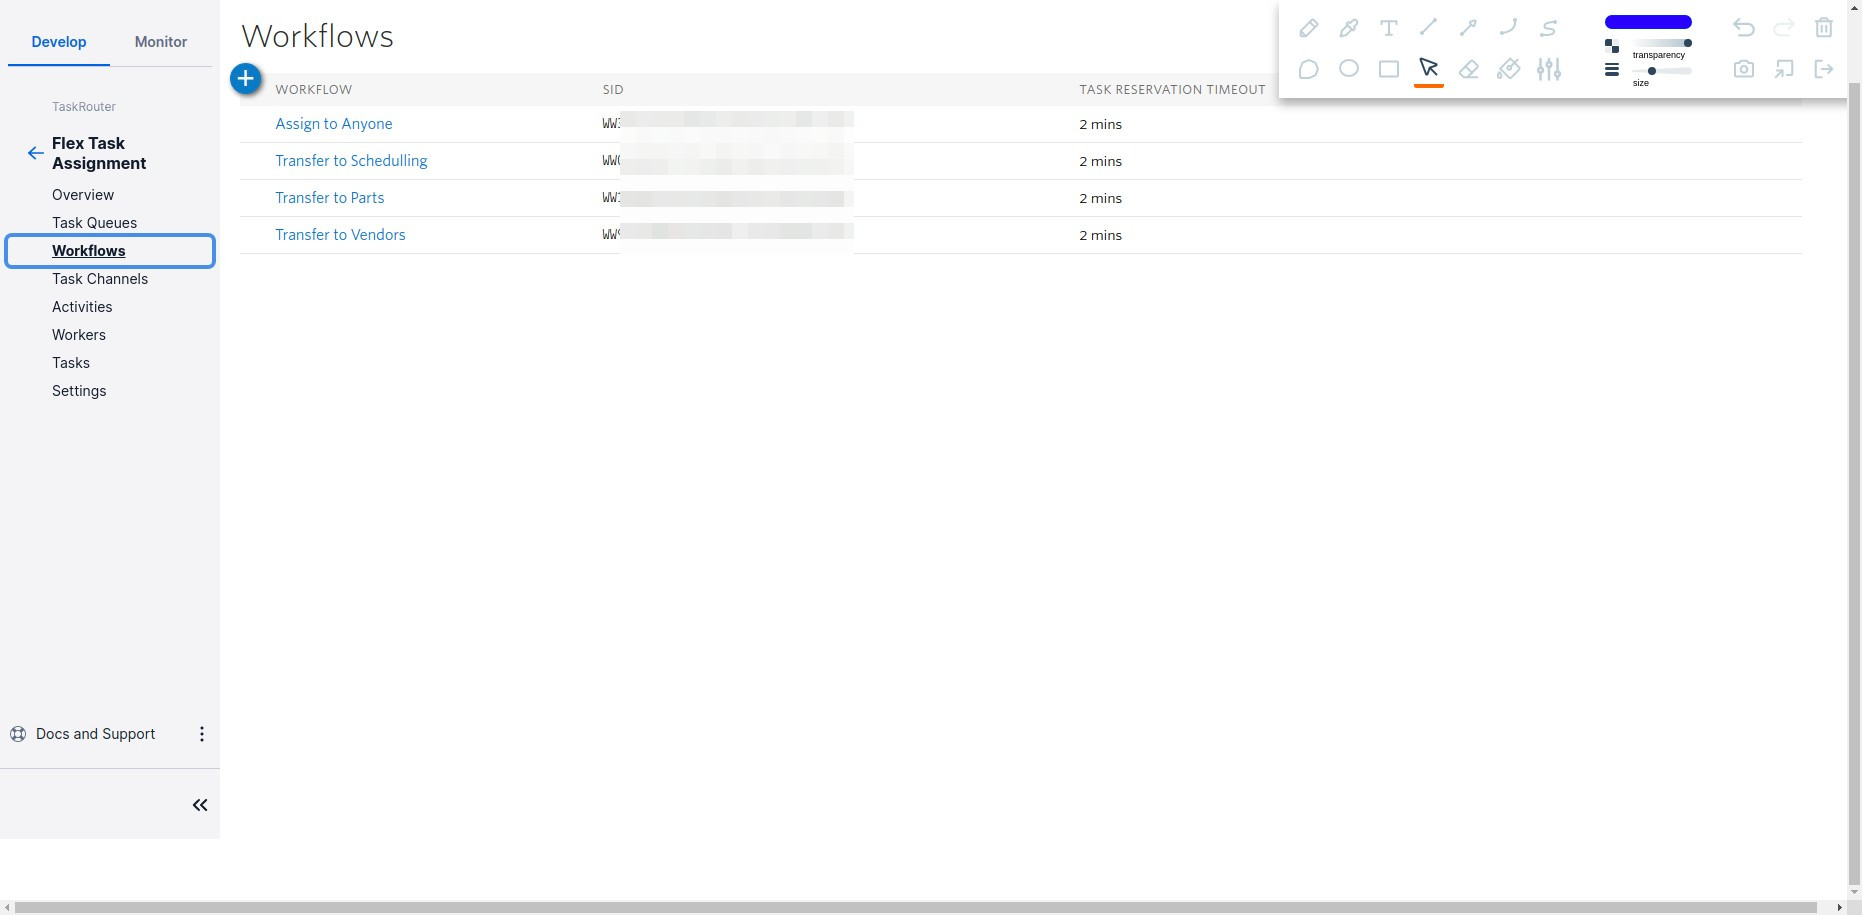
Now Click on Workflows
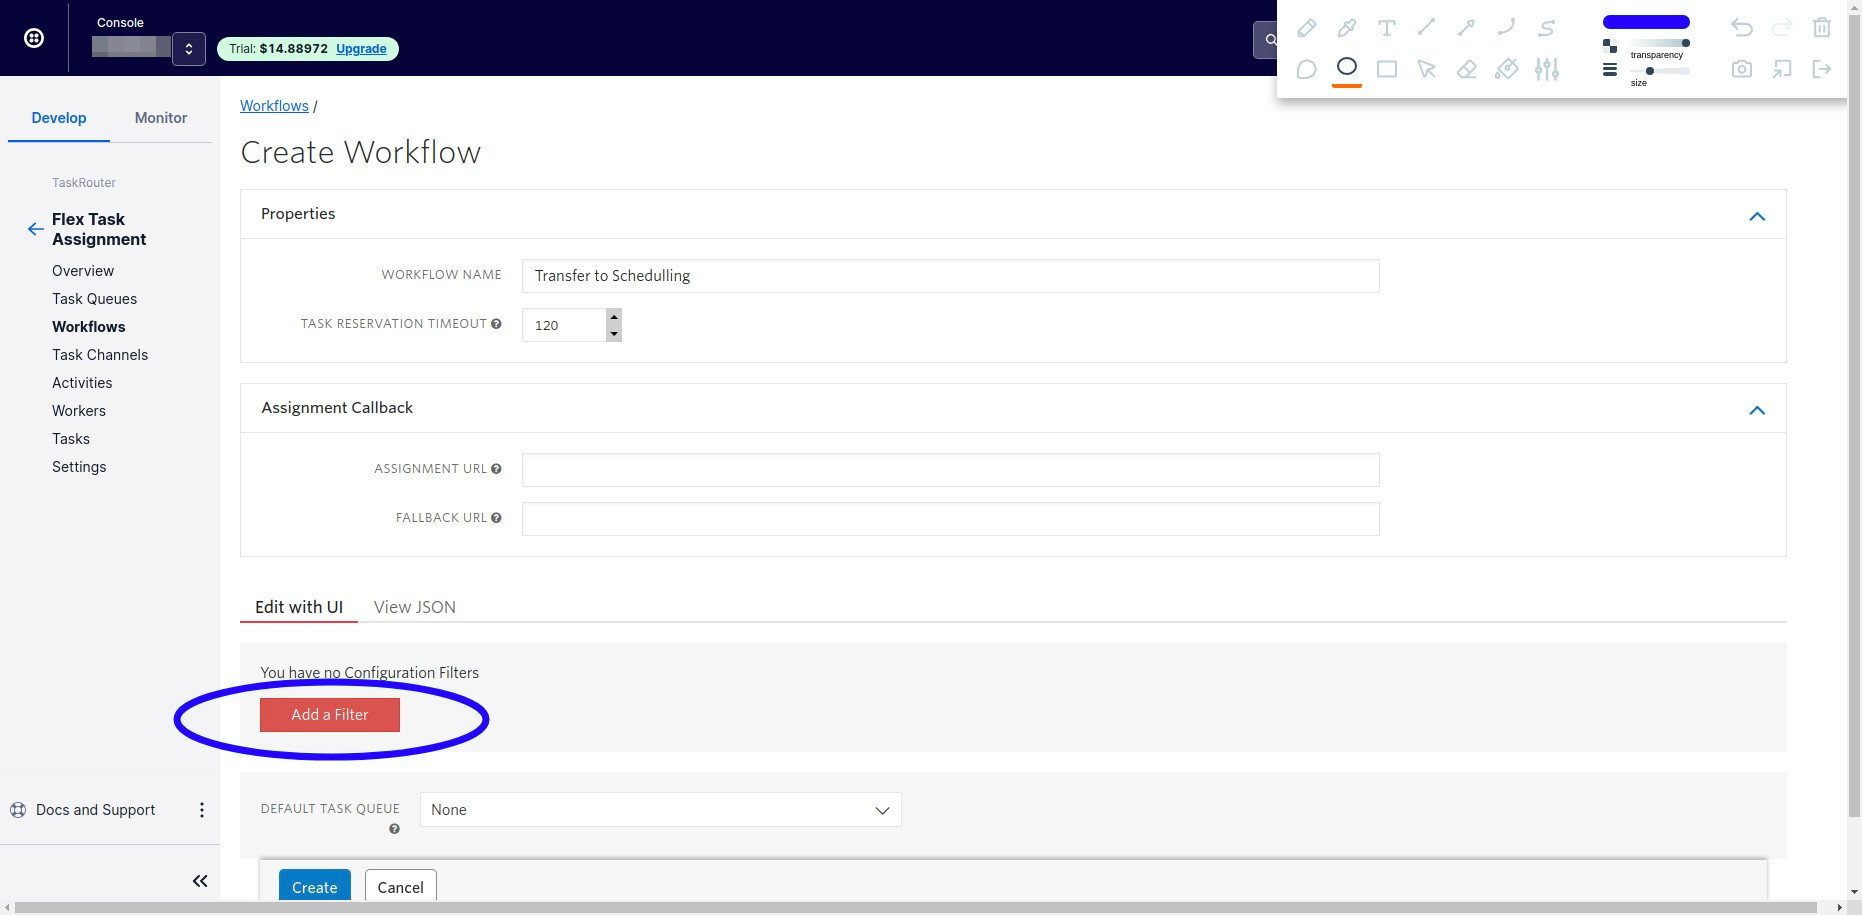
Workflows are what deliver the tasks to the queues. We need to create a workflow for each of our skills. Let’s create the Scheduling workflow. Click on the + button
For the name add “Transfer to Scheduling”. Then click on Add a filter
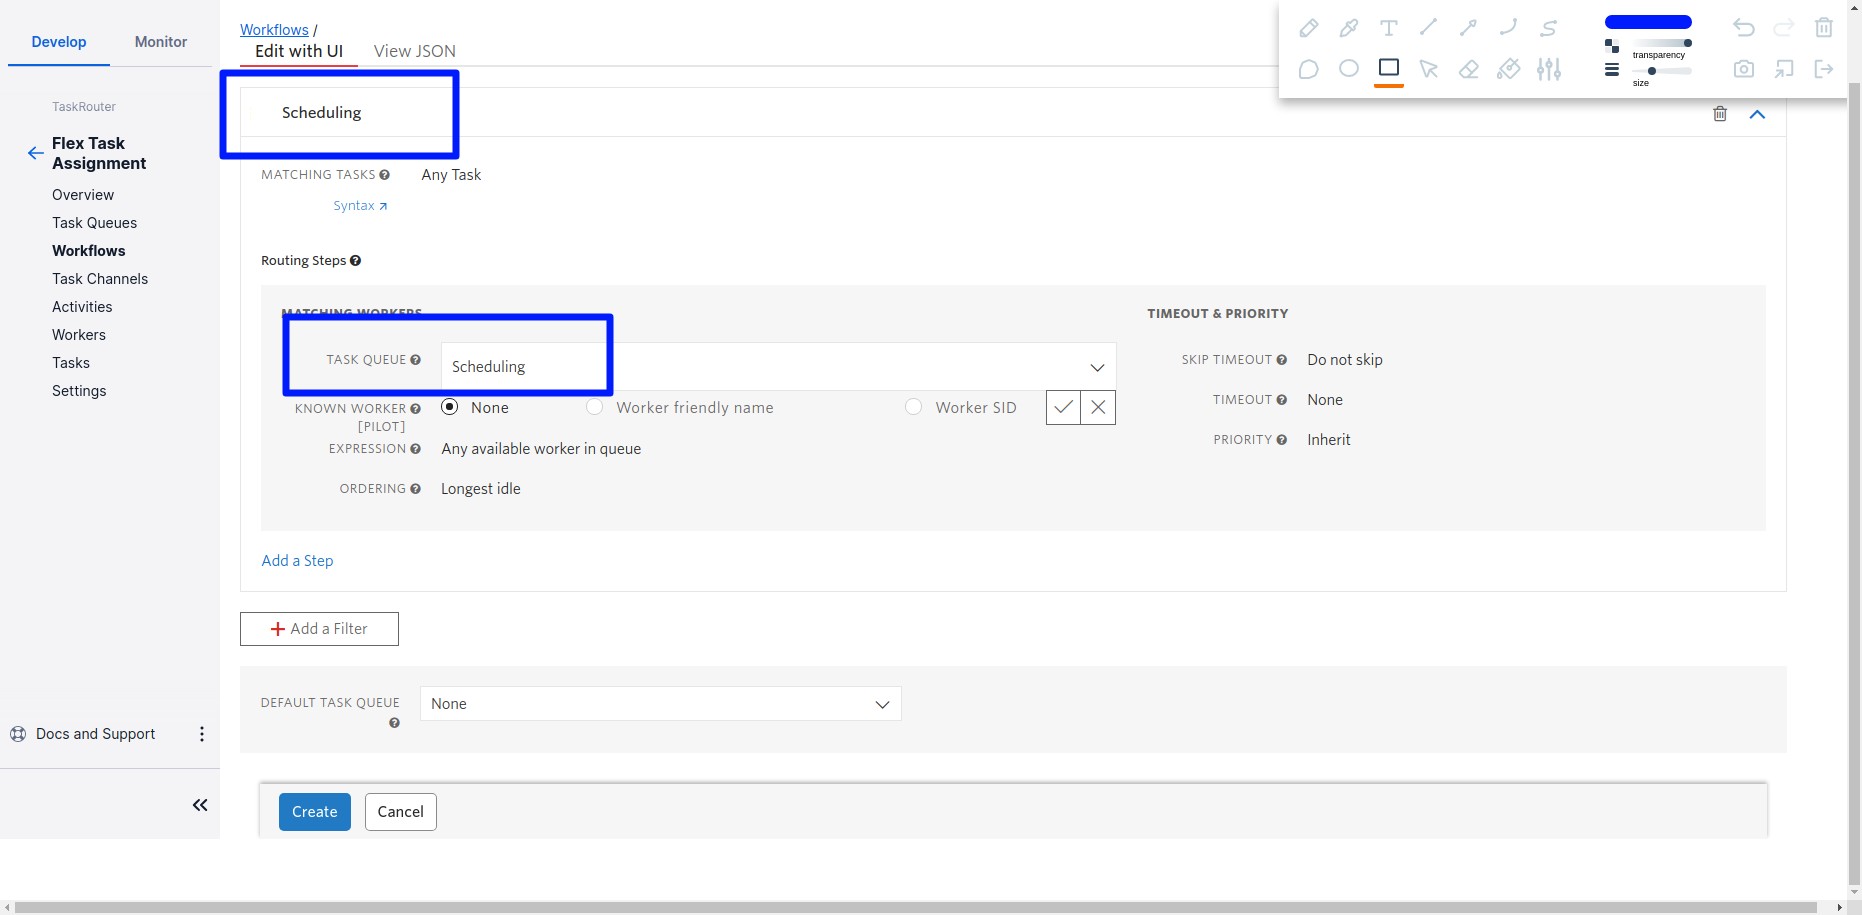
For the filter on the workflow change the name to Scheduling, and change the task queue to Scheduling Queue we created before.
Click on Workflows on the left nav and repeat the steps to create a Workflow for Parts and Vendors:
Parts Workflow:
- Workflow name: Transfer to Parts
- Filter name: Parts
- Filter Queue: Parts
Vendors Workflow
- Workflow name: Transfer to Vendors
- Filter name: Vendors
- Filter Queue: Vendors
Once we are done we should have 4 workflows:
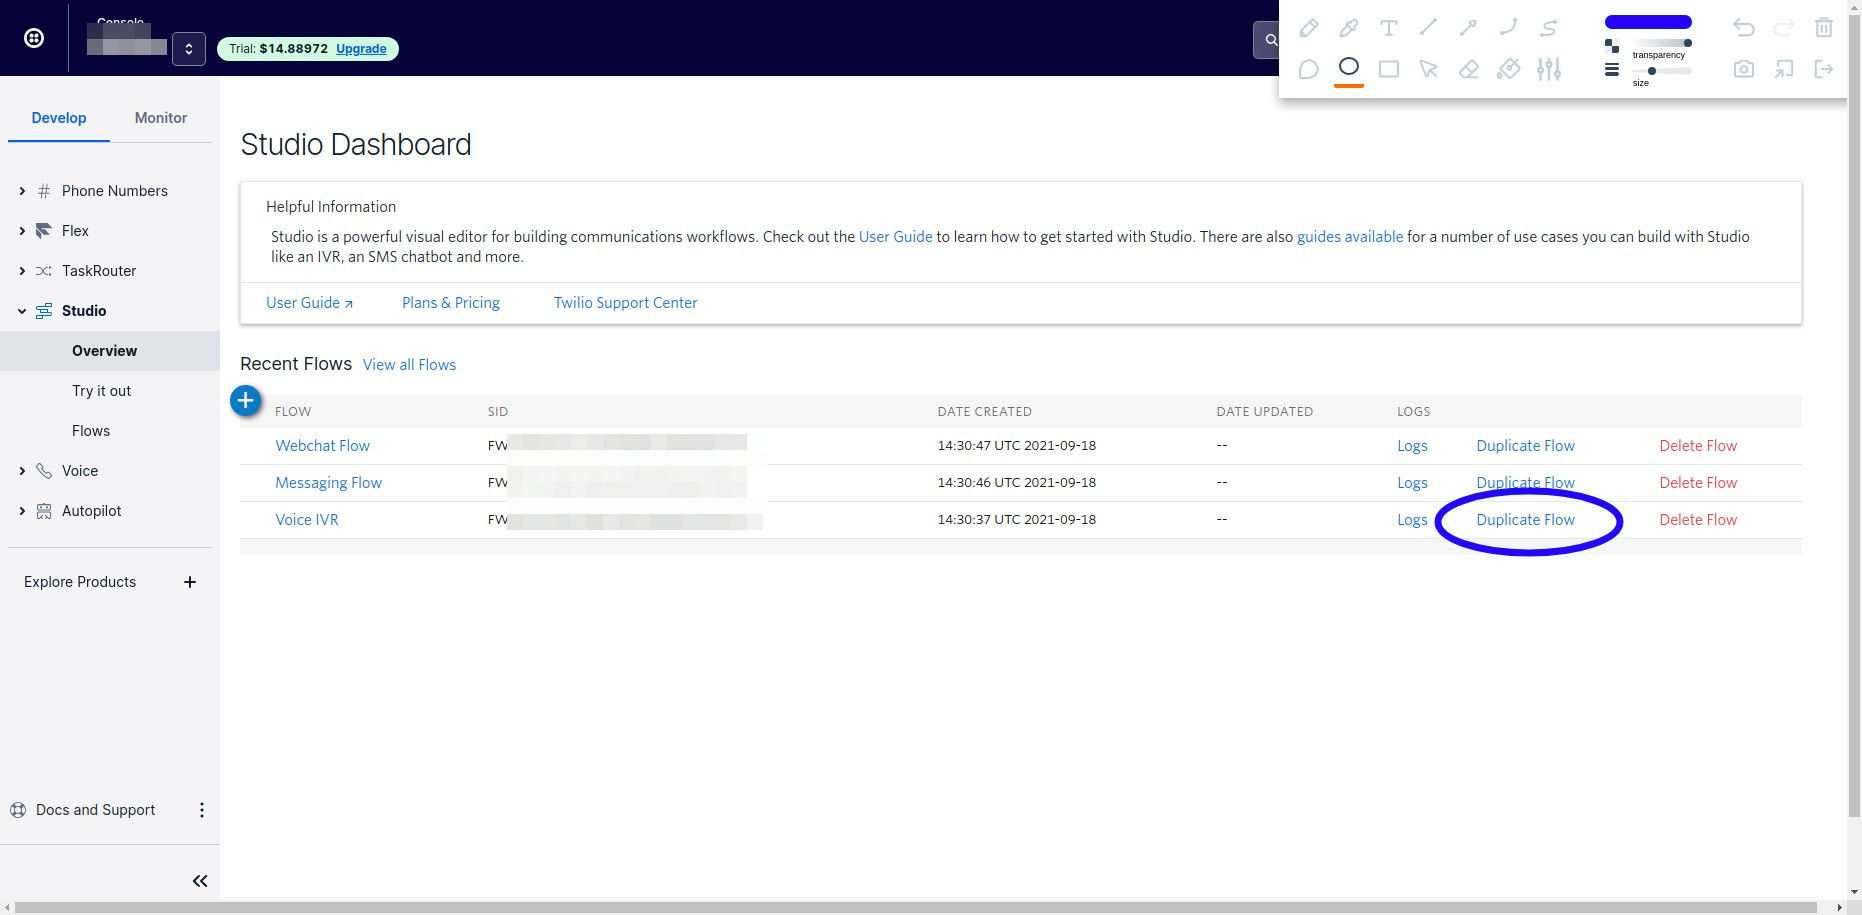
Now for the fun part, let’s go to Twilio Studio and set up our IVR. Navigate to Twilio Studio using the left nav bar. Next to the Voice IVR, click on Duplicate Flow
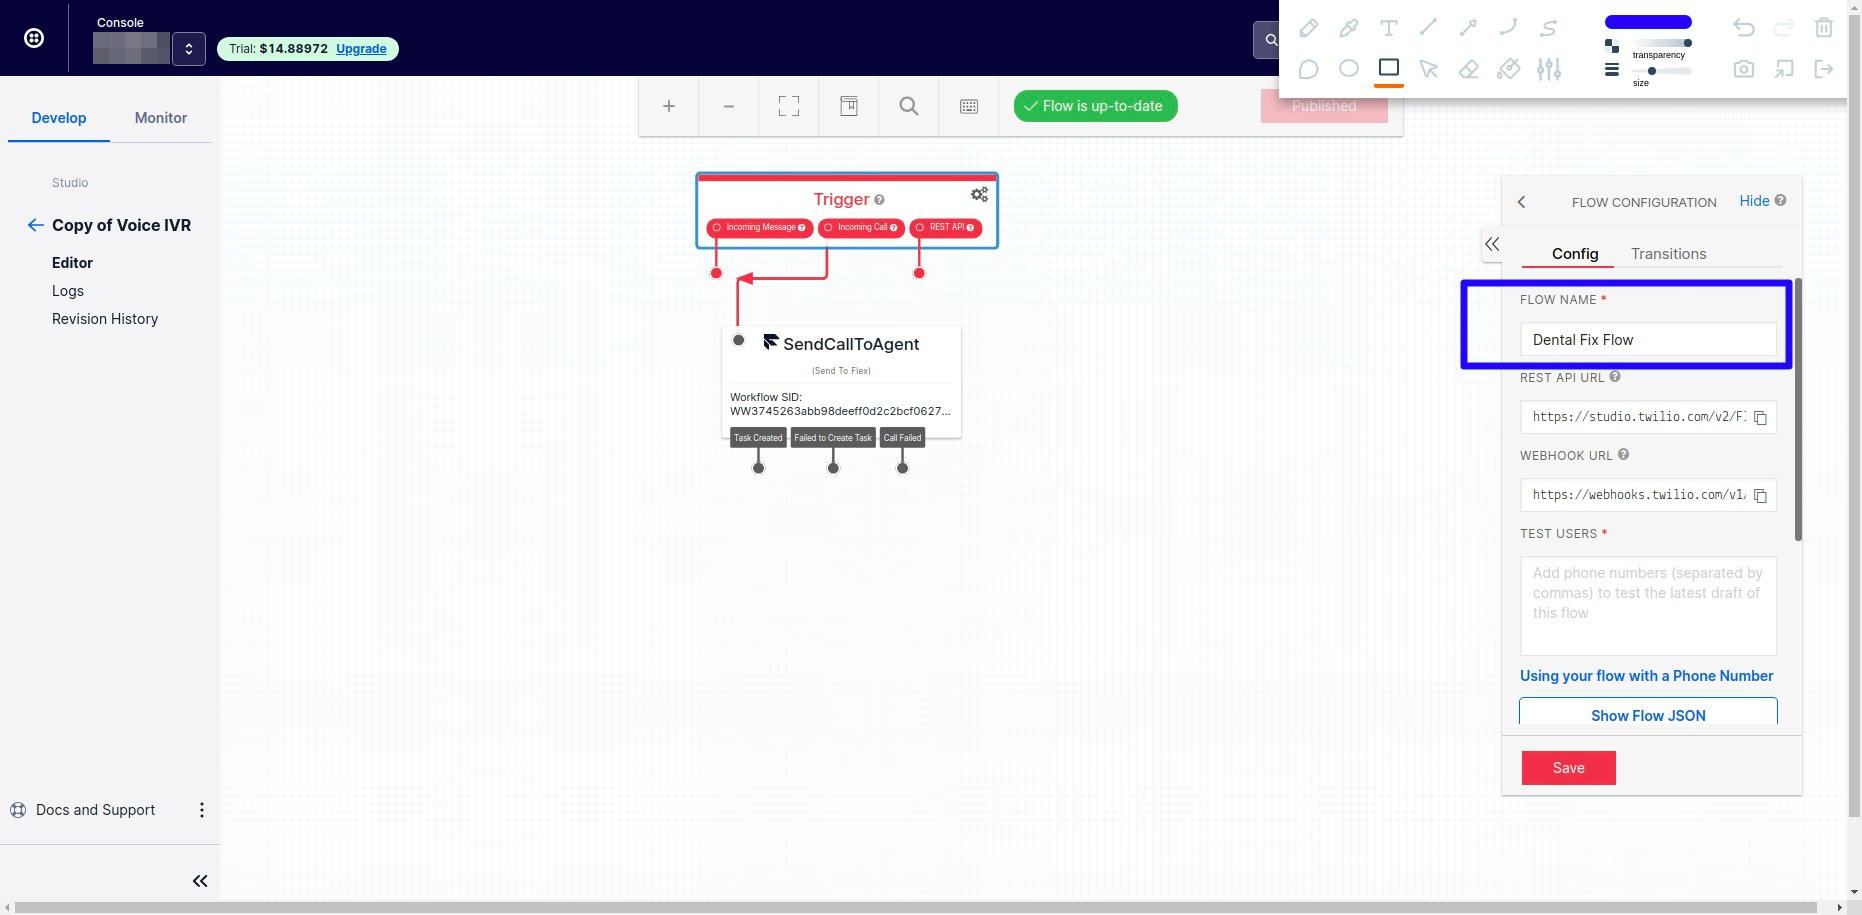
Change the Name of the flow by clicking on the Trigger widget and changing the flow name, then click save.
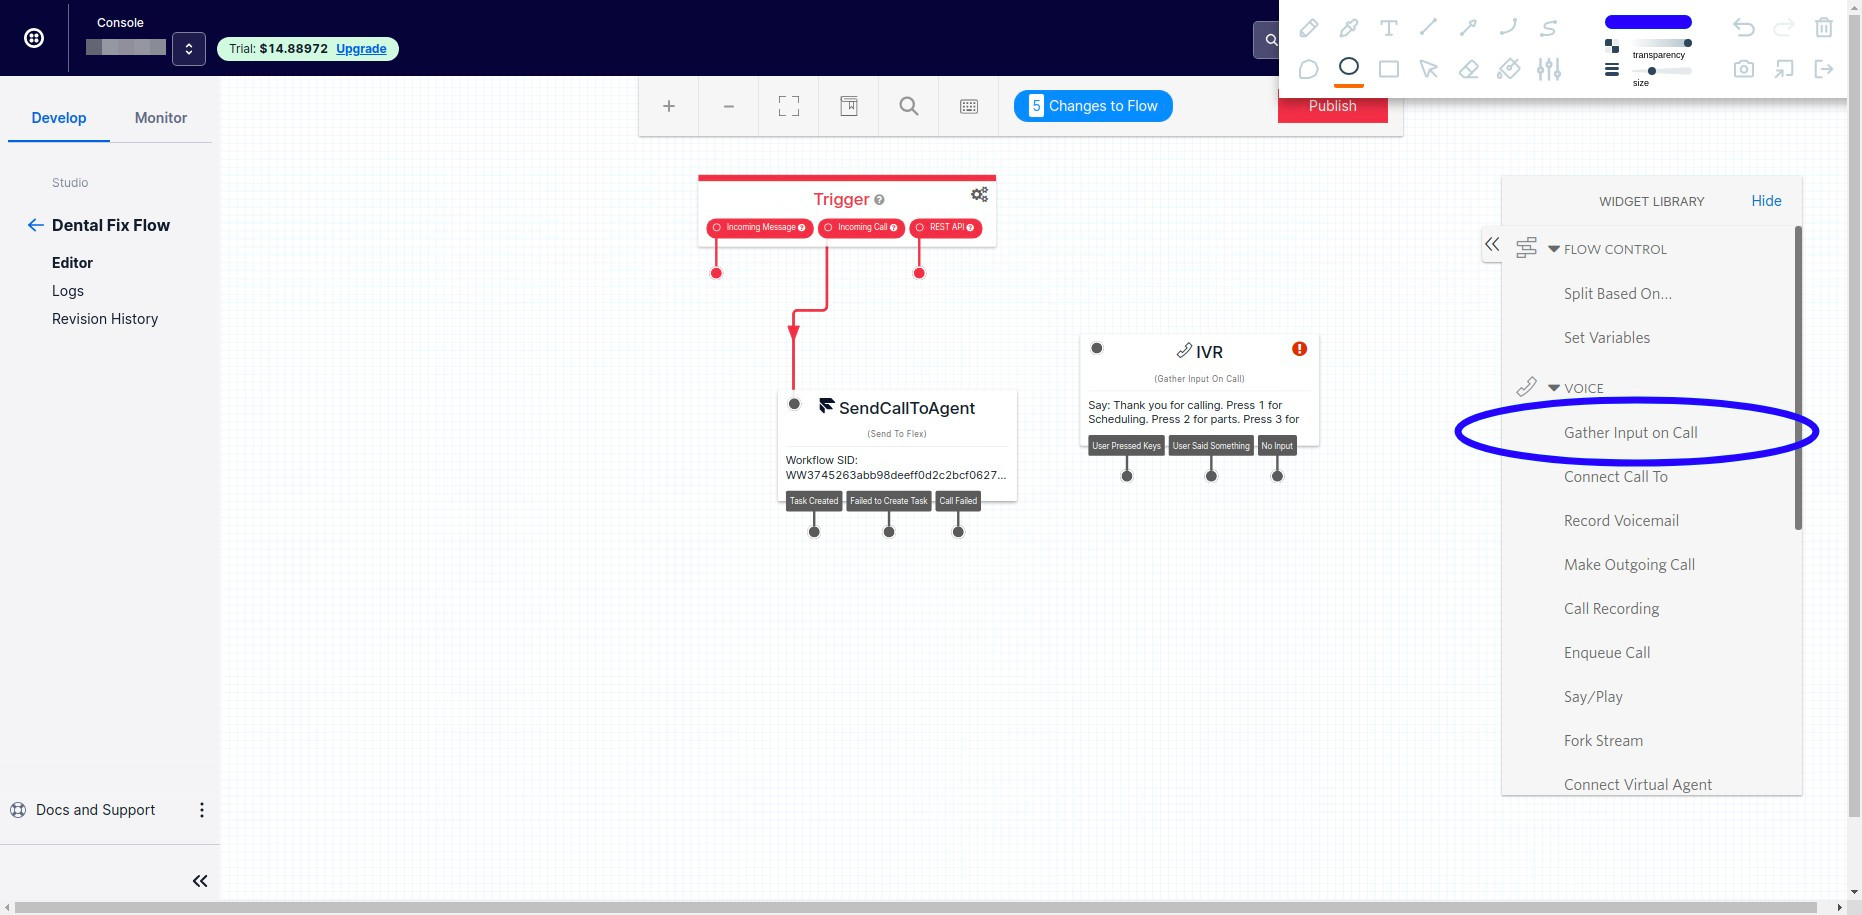
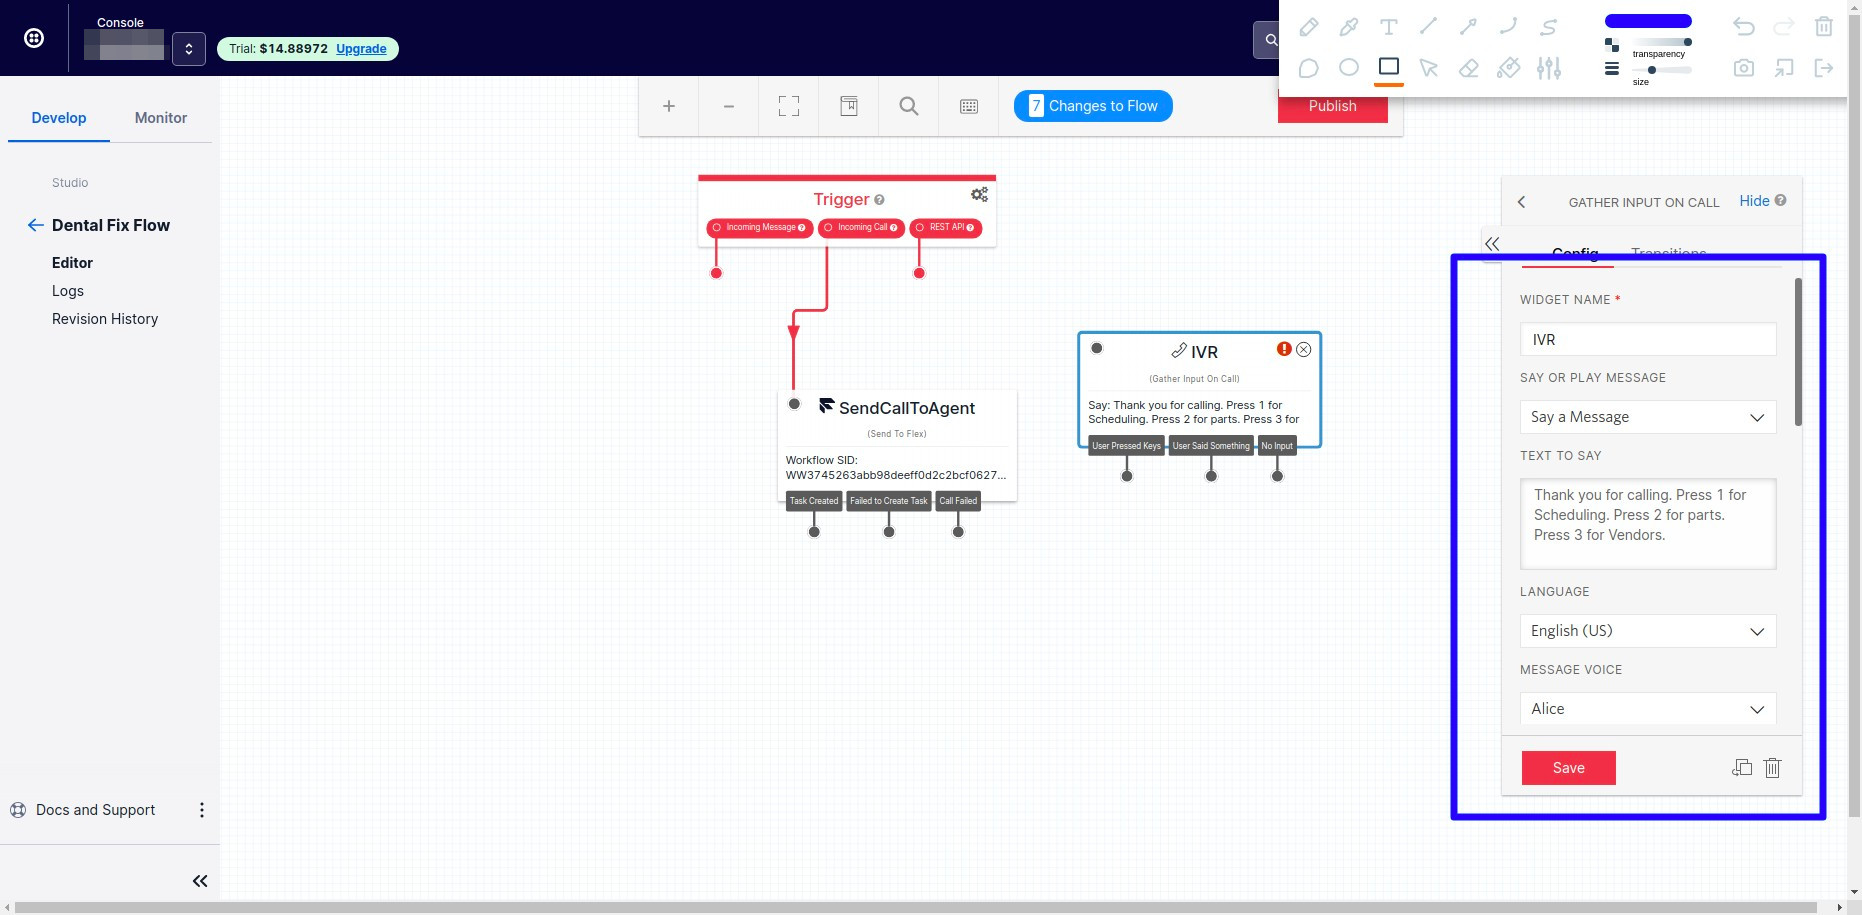
Let’s create an Gather widget. On the Widget library on the right hand side, click on Gather Input on Call, and drag it to the work area.
Now click on the widget to configure it.
- Name: IVR
- Say or Play message: Say a Message
- Text to say: Thank you for calling. Press 1 for Scheduling. Press 2 for parts. Press 3 for Vendors.
- Language: English US
- Message Voice: Alice
- Loops: 1
- Stop Gathering after: 10 seconds
- Rest you can leave as is
Now connect the Incoming Call from the Trigger into the IVR we just created, then delete the unused widget.

Now add a Split Based On… widget
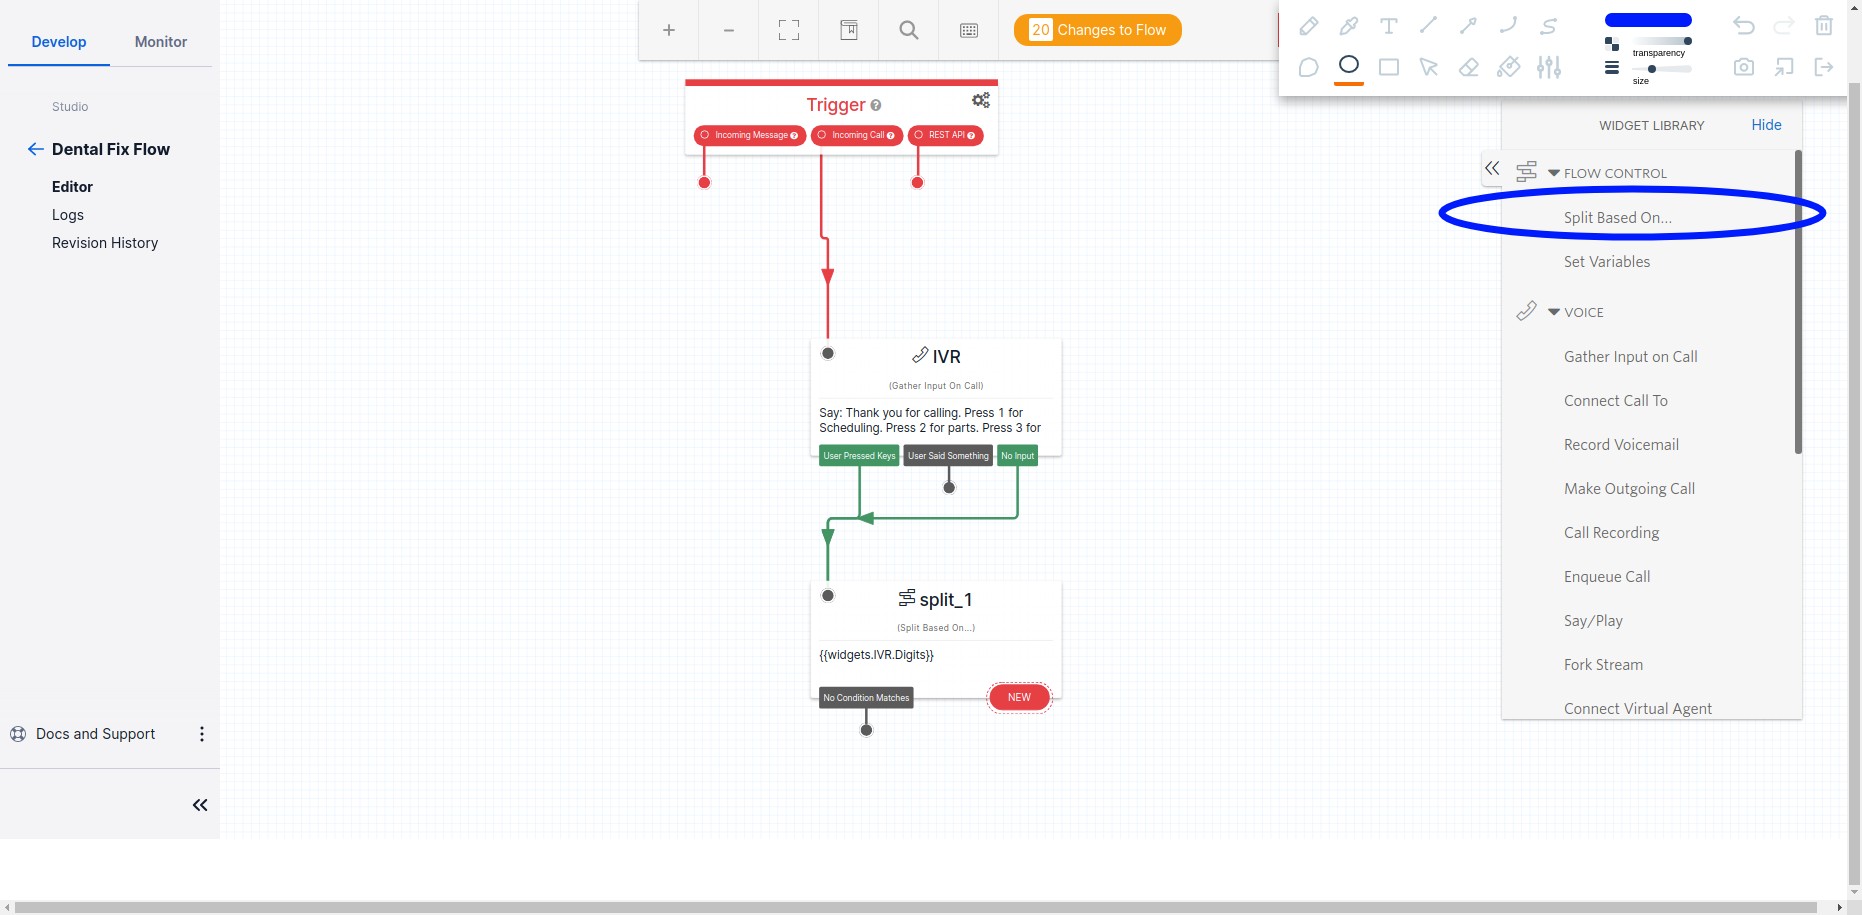
Configure it:
- Name: split_1
- Variable to test: widgets.IVR.Digits
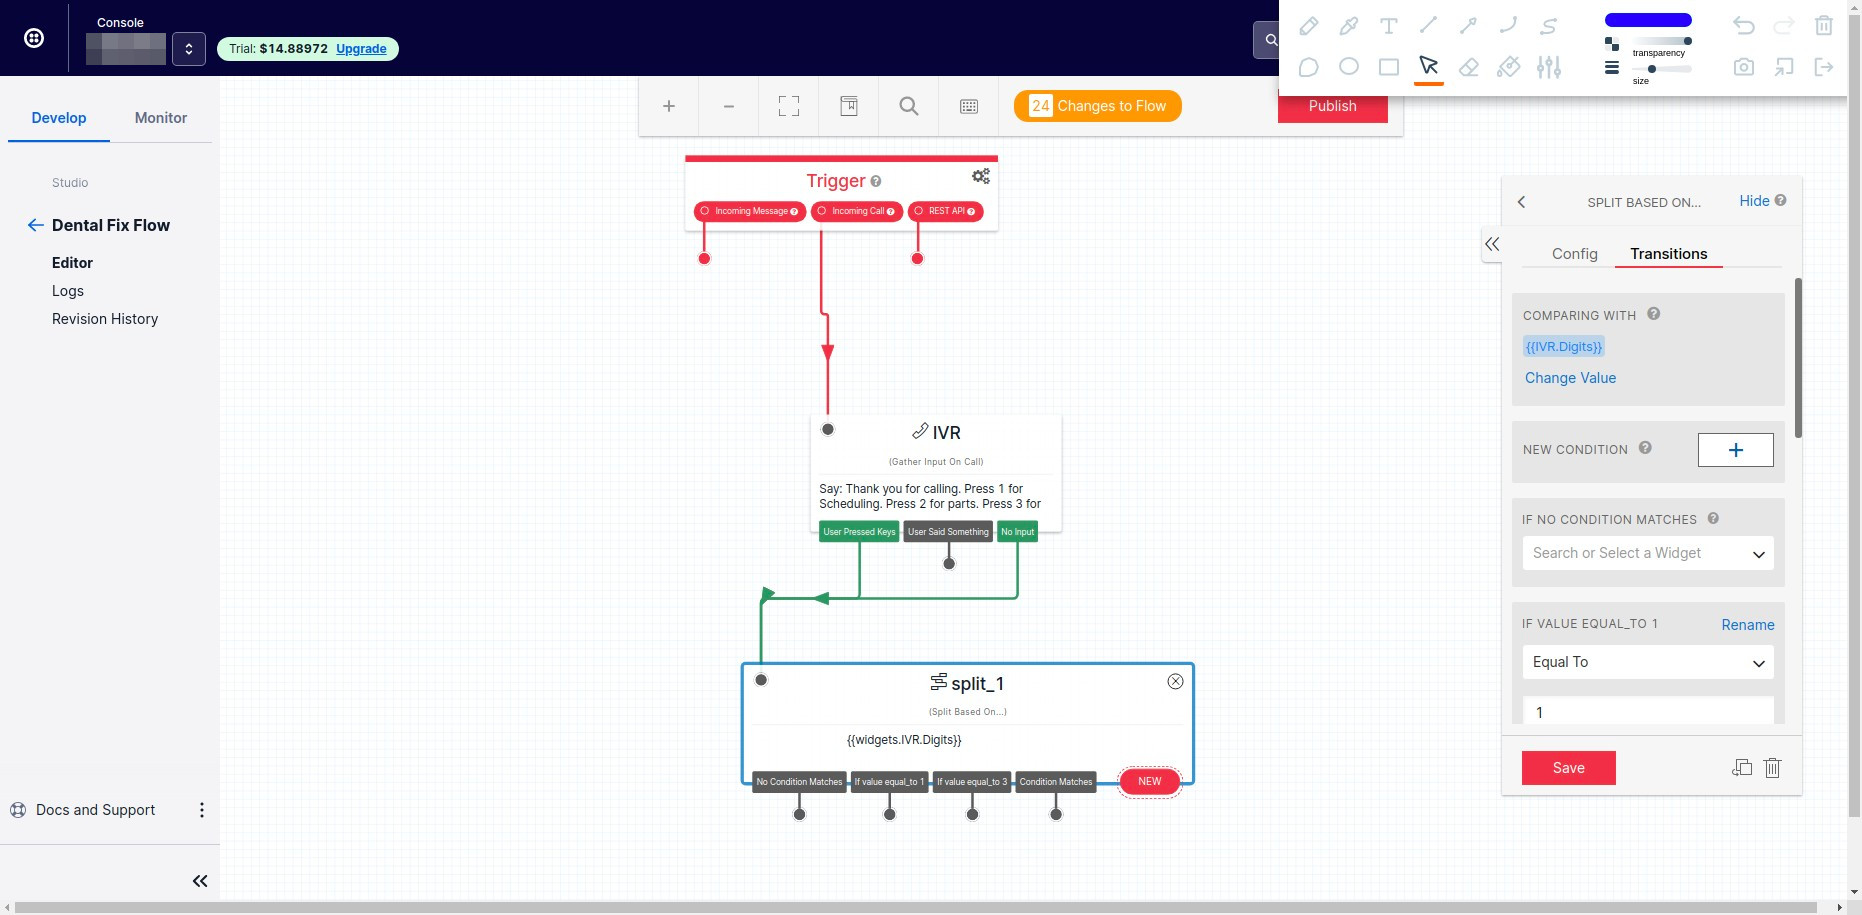
Then click on Transitions and add 3 conditions:
- Equal To 1
- Equal To 2
- Equal To 3
Then click Save. Your IVR should look like the following:
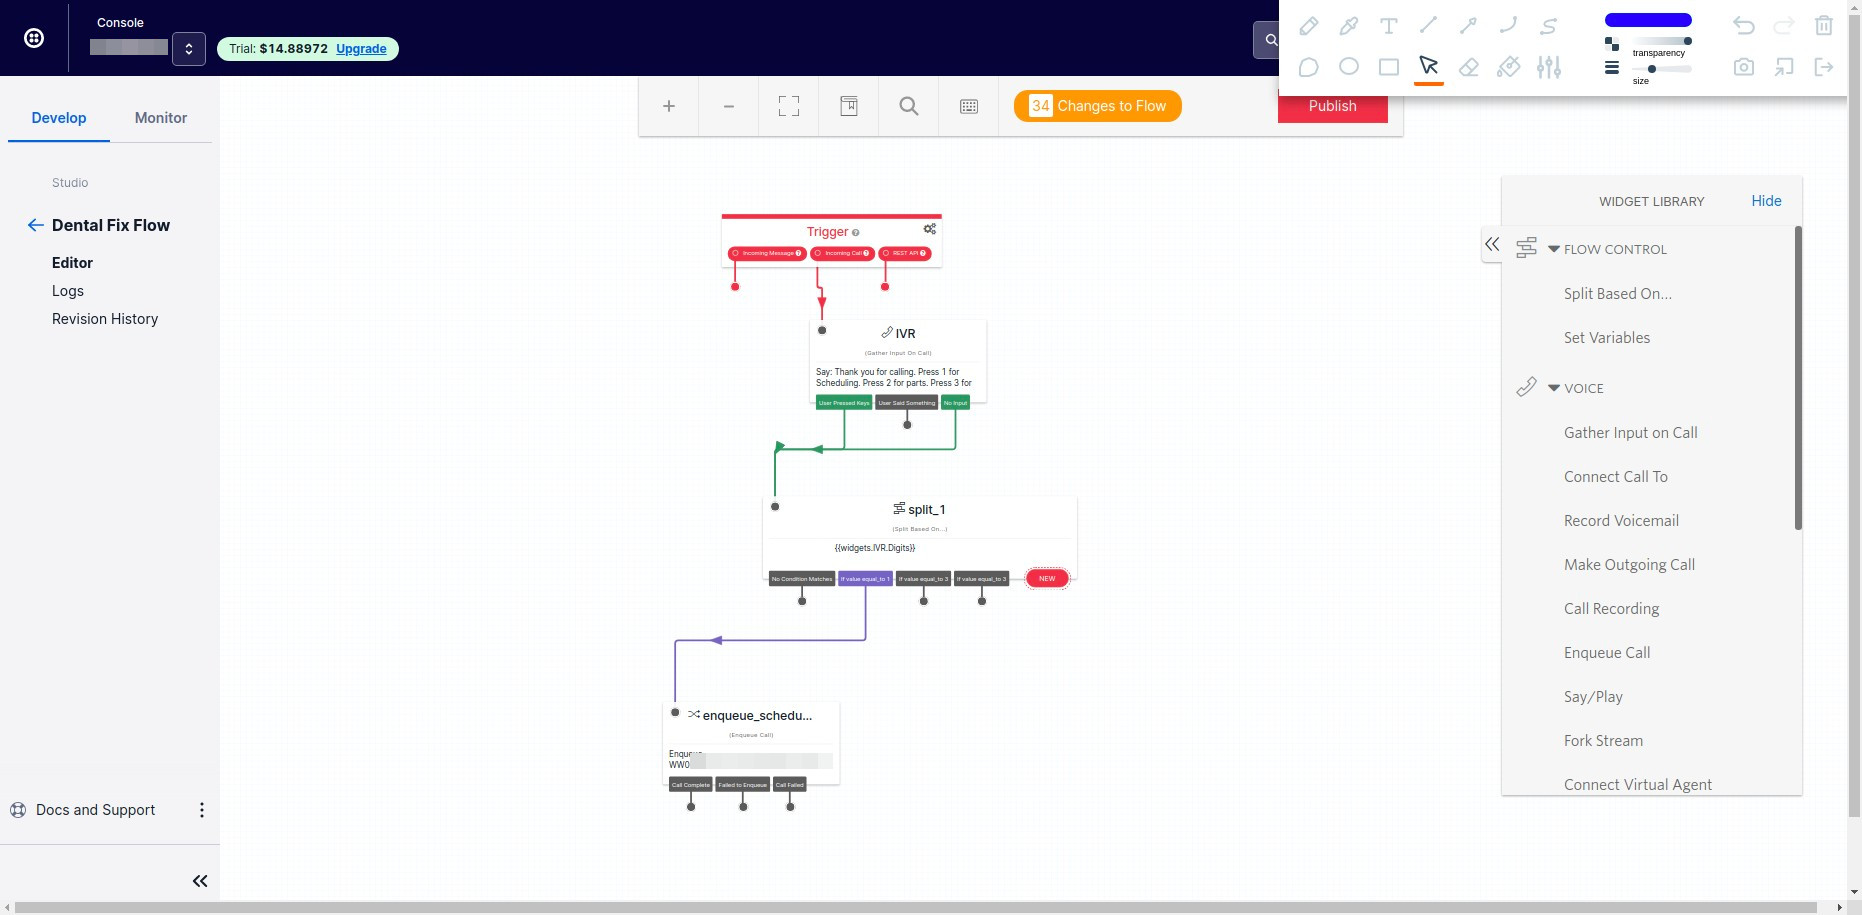
Almost there! Now we are going to add an Enqueue Call widget, which will send the call to the agents. Drag an Enqueue Call widget to the work area and click it to configure it:
- Widget Name: enqueue_scheduling
- Queue or Taskrouter Task: Taskrouter task
- Task router workspace: Flex Task Assignment
- Task router workflow: Transfer to Scheduling
- Task attributes:
{
 "type": "inbound",
 "name": "{{trigger.call.From}}",
 "skillsNeeded": "Scheduling"
}
Don’t forget to save your widget. Then connect the if value equal_to 1 to the enqueue. Your IVR should look like the following:
Repeat the steps for an enqueue for Parts and for Vendors.
Parts:
- Widget Name: enqueue_parts
- Queue or Taskrouter Task: Taskrouter task
- Task router workspace: Flex Task Assignment
- Task router workflow: Transfer to Parts
- Task attributes:
{
 "type": "inbound",
 "name": "{{trigger.call.From}}",
 "skillsNeeded": "Parts"
}
Vendors:
- Widget Name: enqueue_vendors
- Queue or Taskrouter Task: Taskrouter task
- Task router workspace: Flex Task Assignment
- Task router workflow: Transfer to Vendors
- Task attributes:
{
 "type": "inbound",
 "name": "{{trigger.call.From}}",
 "skillsNeeded": "Vendors"
}
When we are done we should have all 3 enqueue widgets:

Now click on Publish at the top to publish our IVR. Now that we have our Twilio Studio ready to go, we need to tell Twilio to assign it to the phone number provided in our account. Click on the left nav bar in the Phone Numbers > Manage > Active Numbers. Then click on the phone number we are going to assign this Twilio Studio flow to.

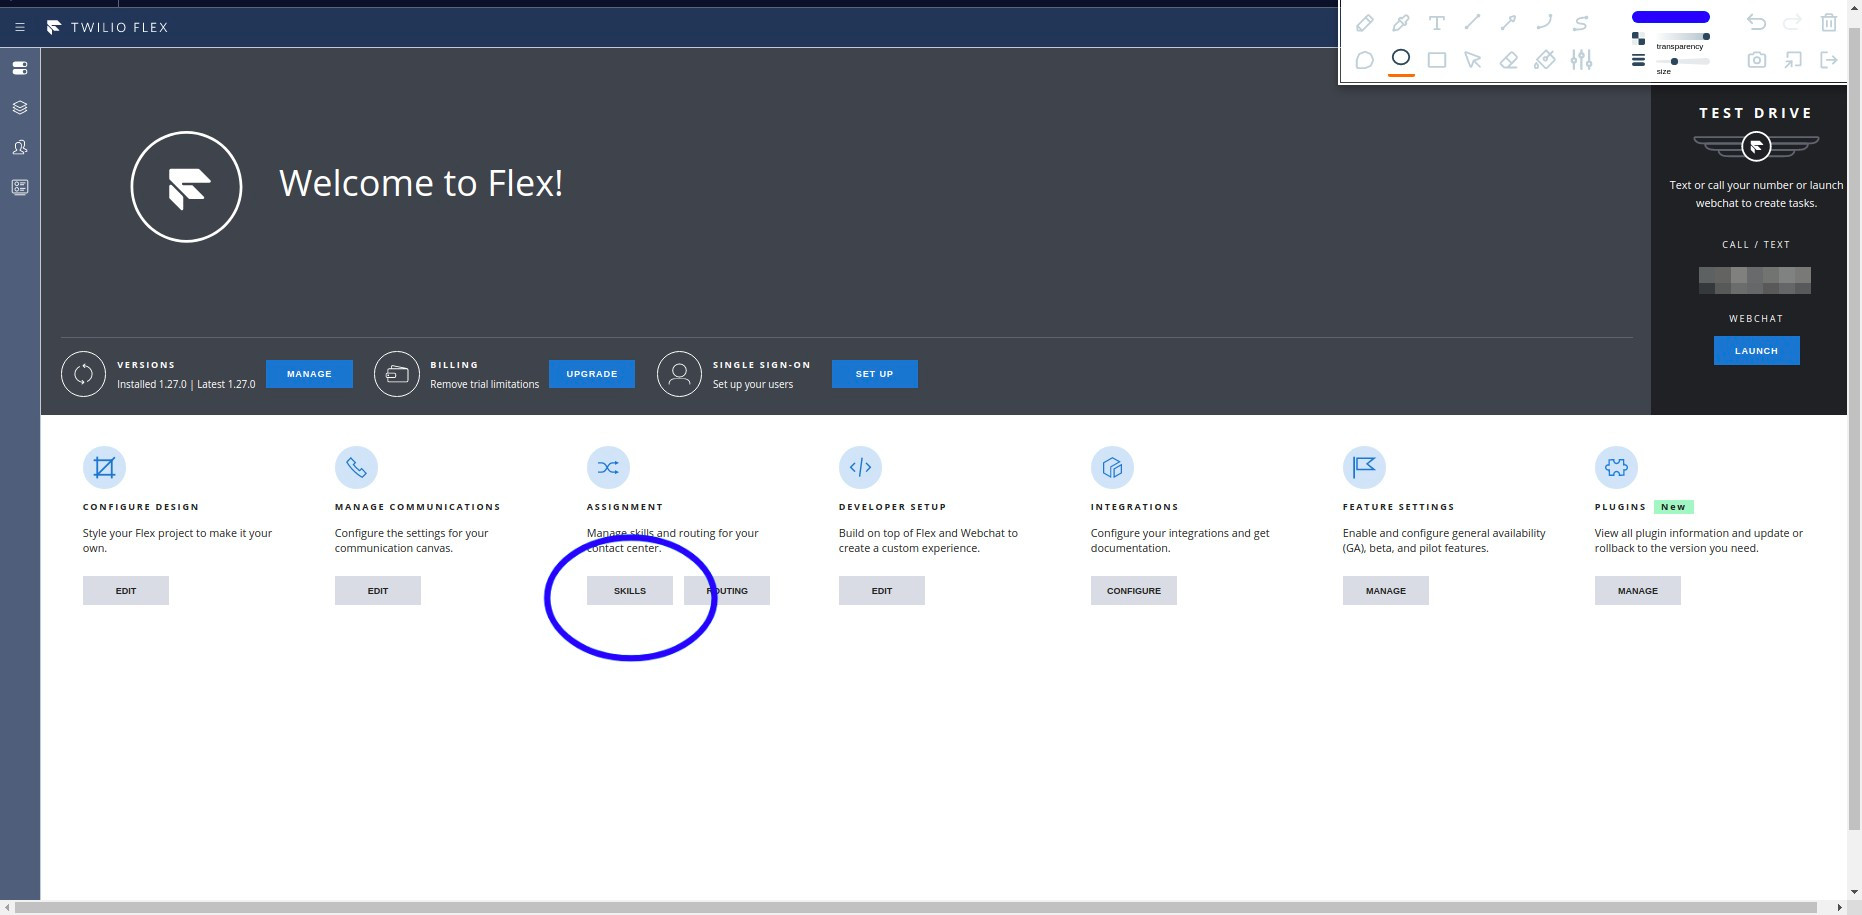
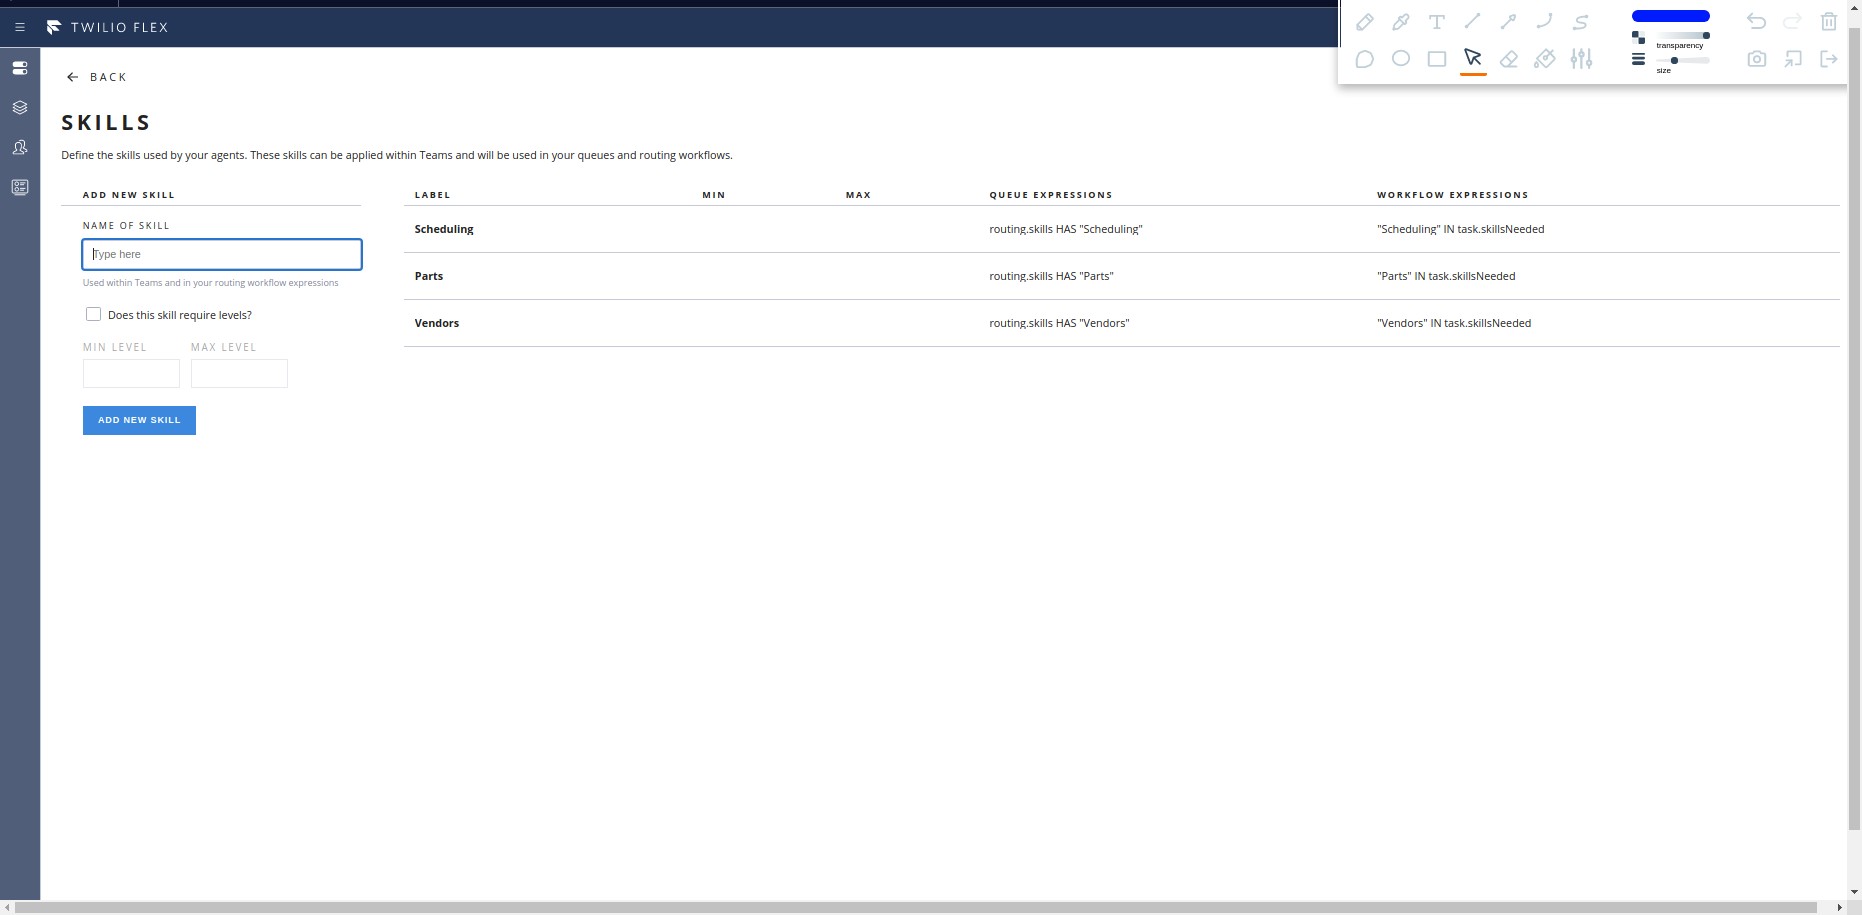
Next to a Call Comes In, select Studio flow, select our newly created flow and click save at the bottom. Last piece of the puzzle is to add skills to our agents. Let’s go back to Twilio Flex and click on skills.
Lets add the 3 skills on the left hand side.
Now click on agents and add the scheduling skill to your agent. Make sure you hit save!
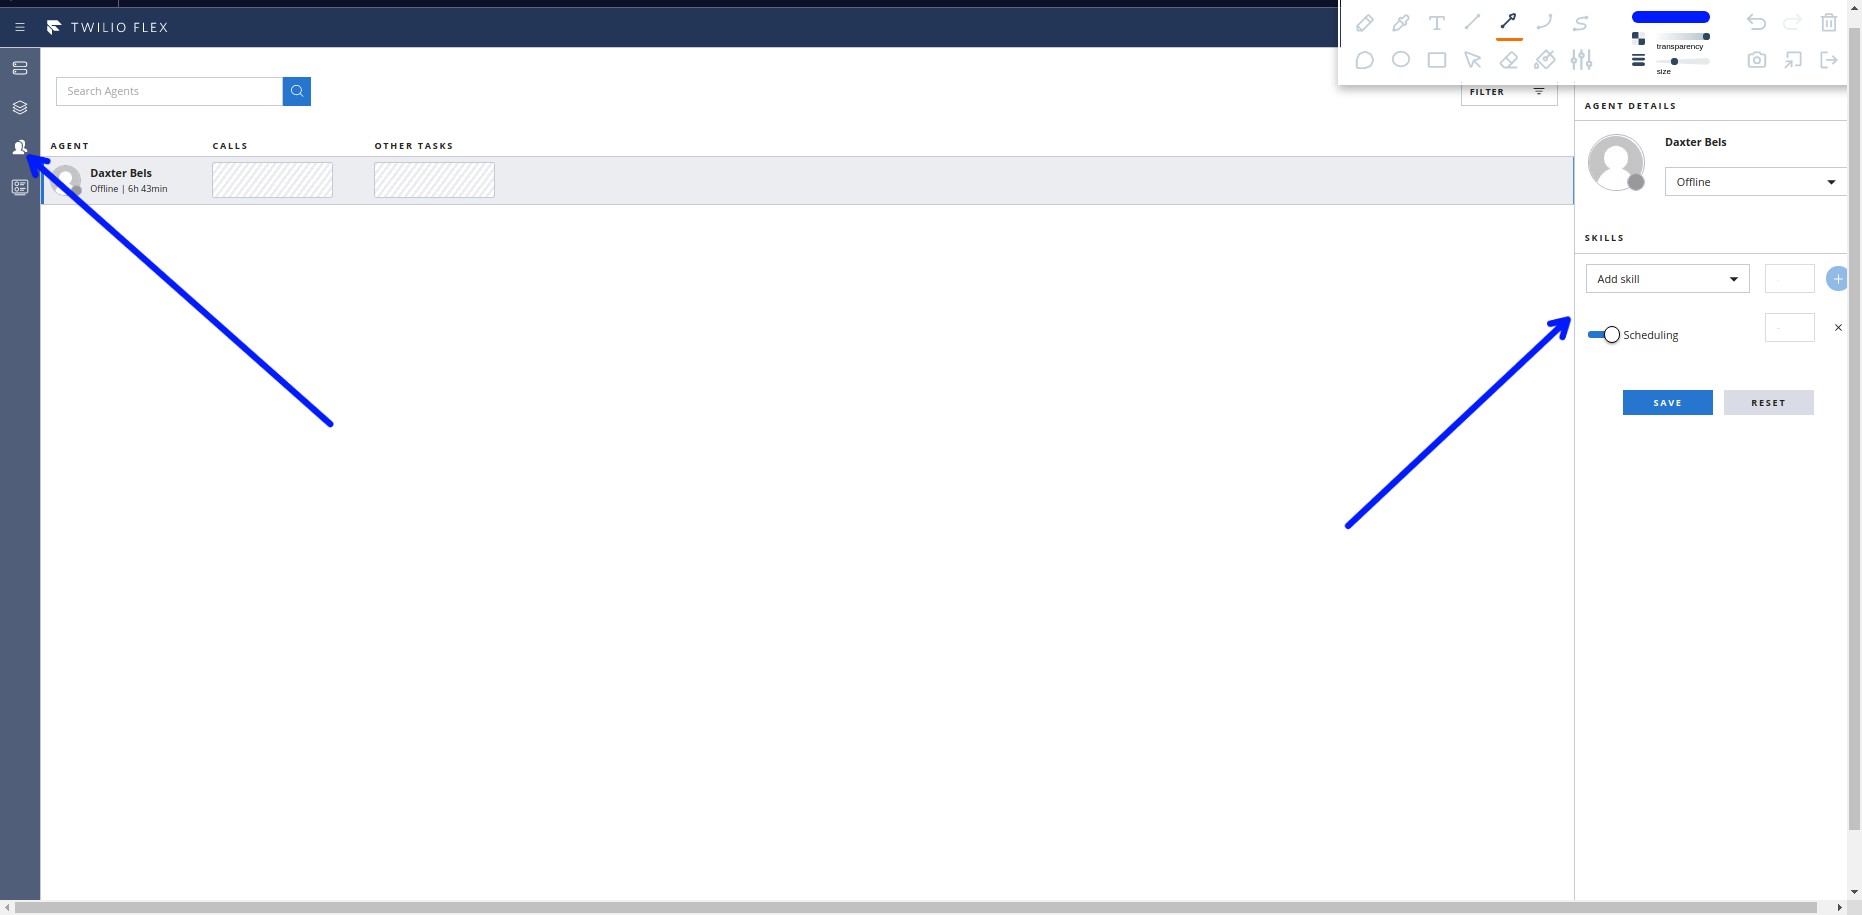
Since we only added the Scheduling skill, our agent will only get calls if we press 1 for scheduling. If we press 2 or 3 he or she won’t get the call. Call the number, hear the ivr and press 1, you should get the call if you are logged into Flex and available. If you call again and press 2 or 3 you are not going to get the call because the agent doesn’t have the parts or vendor skill. You can add more agents with the parts and vendor skill and now the call should be directed to the best available agent!