In this post we are going to learn how to do an LDAP integration between Google and Twilio Flex, to allow for our users to use single sign on (SSO) into our Flex instance.
First we need to get our Google Workspace ready. To do so navigate to https://admin.google.com/ac/customschema
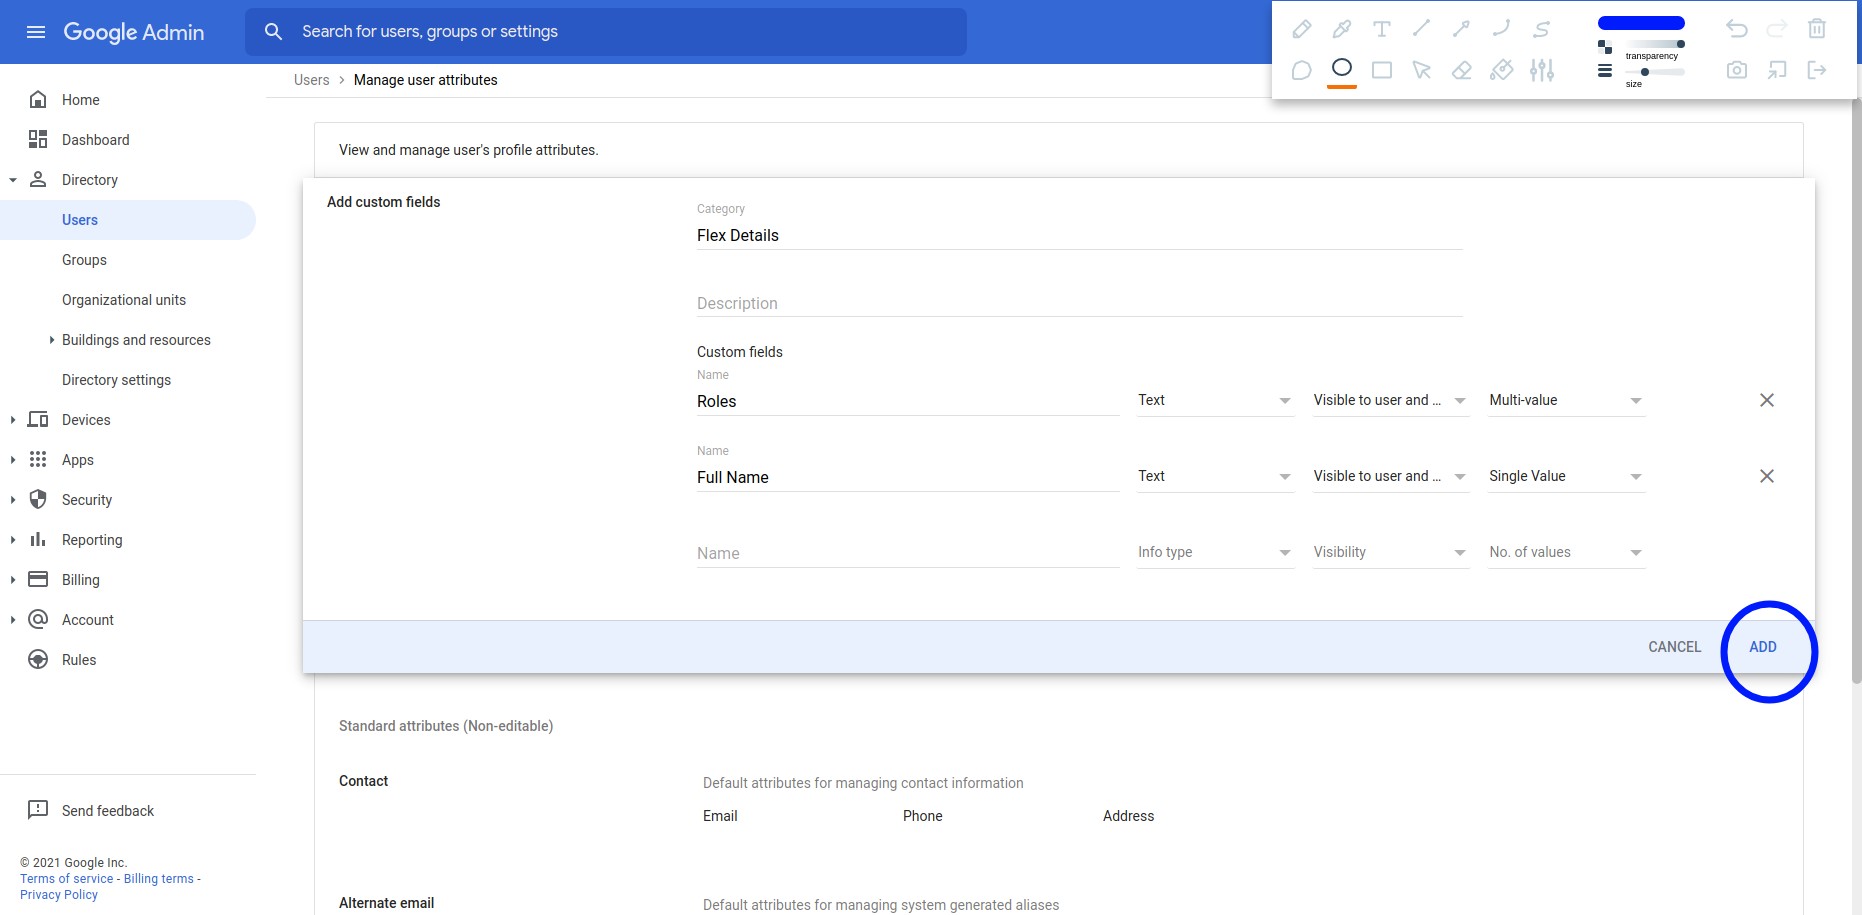
Then click on Add Custom Attribute

We are going to add 2 attributes under the Category: Flex Details.
- Roles:
- Name: Roles
- Info Type: Text
- Visibility: Visible to user and admin
- No. of value: Multi-value
- Full Name:
- Name: Full Name
- Info Type: Text
- Visibility: Visible to user and admin
- No. of value: Single-value
When you are done click add.
Now we are going to create a Custom SAML app in Google Admin. On the Google Admin console navigate to Apps > Web and Mobile Apps. Then Click on Add App > Add Custom SAML App.
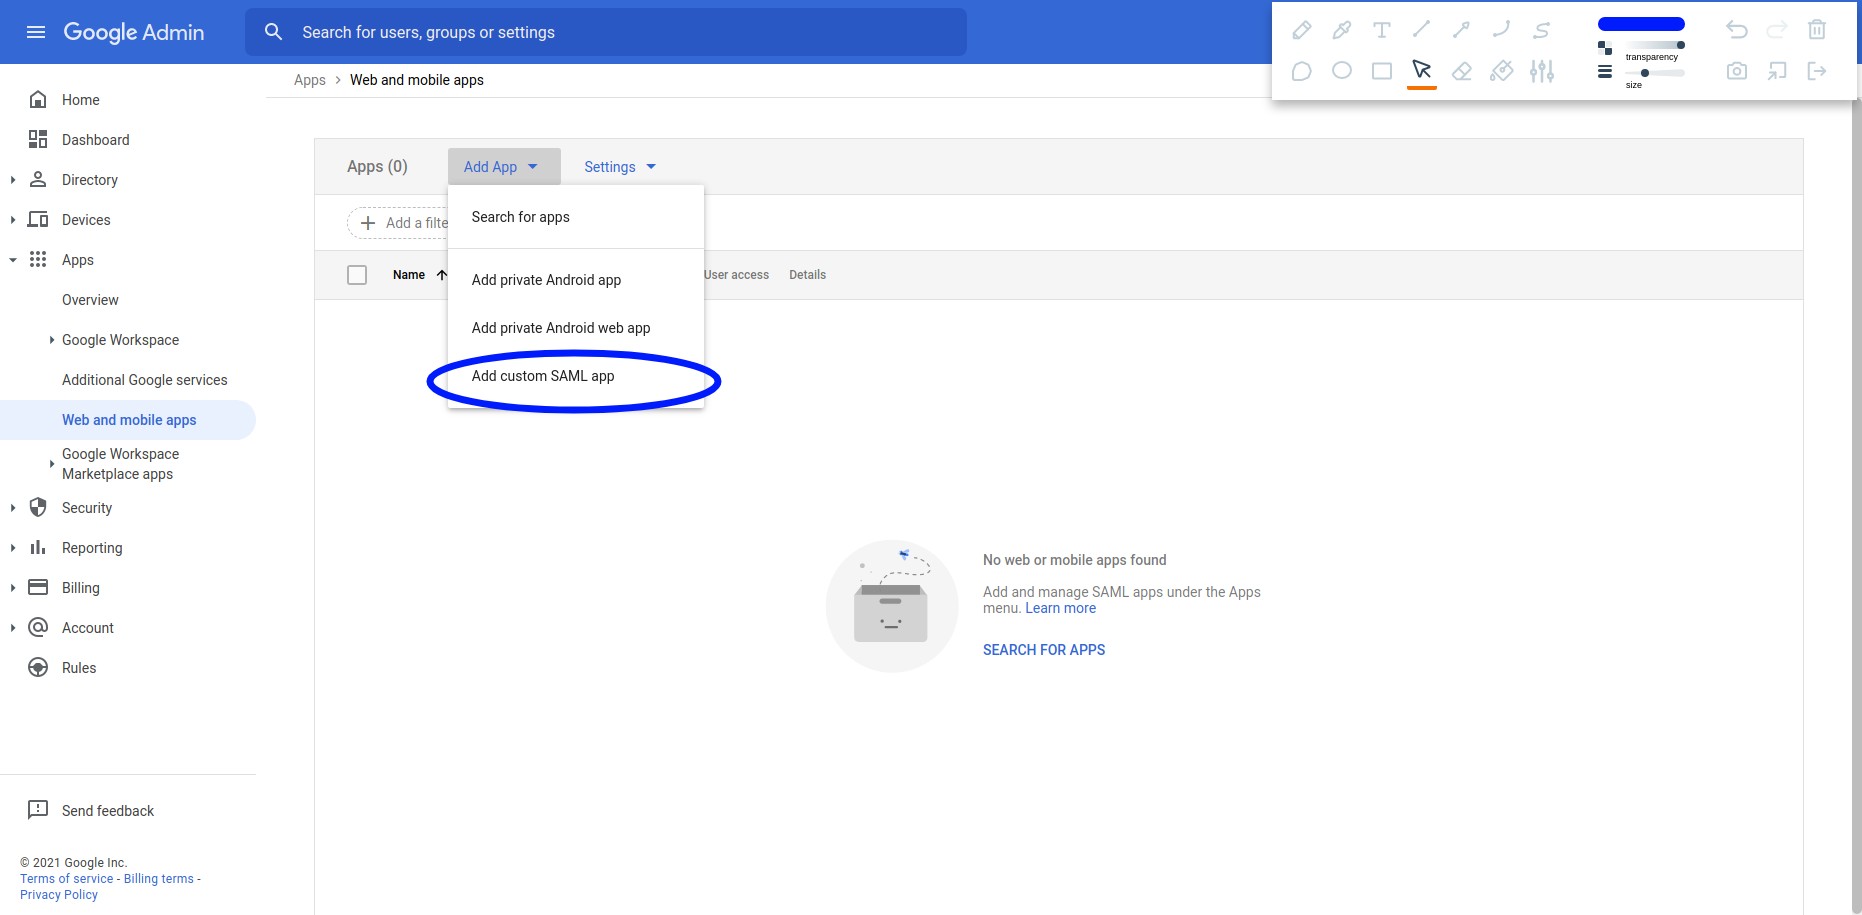
For the name add: Twilio Flex and for the Icon you can add the Flex Icon found here.
On the next step we need to save this values as we are going to need to enter them into Twilio later. So you should save the following 4 values:
- SSO Url
- Entity ID
- Certificate (Copy and Download)
- Sha-256 fingerprint
After saving the values, click Continue.

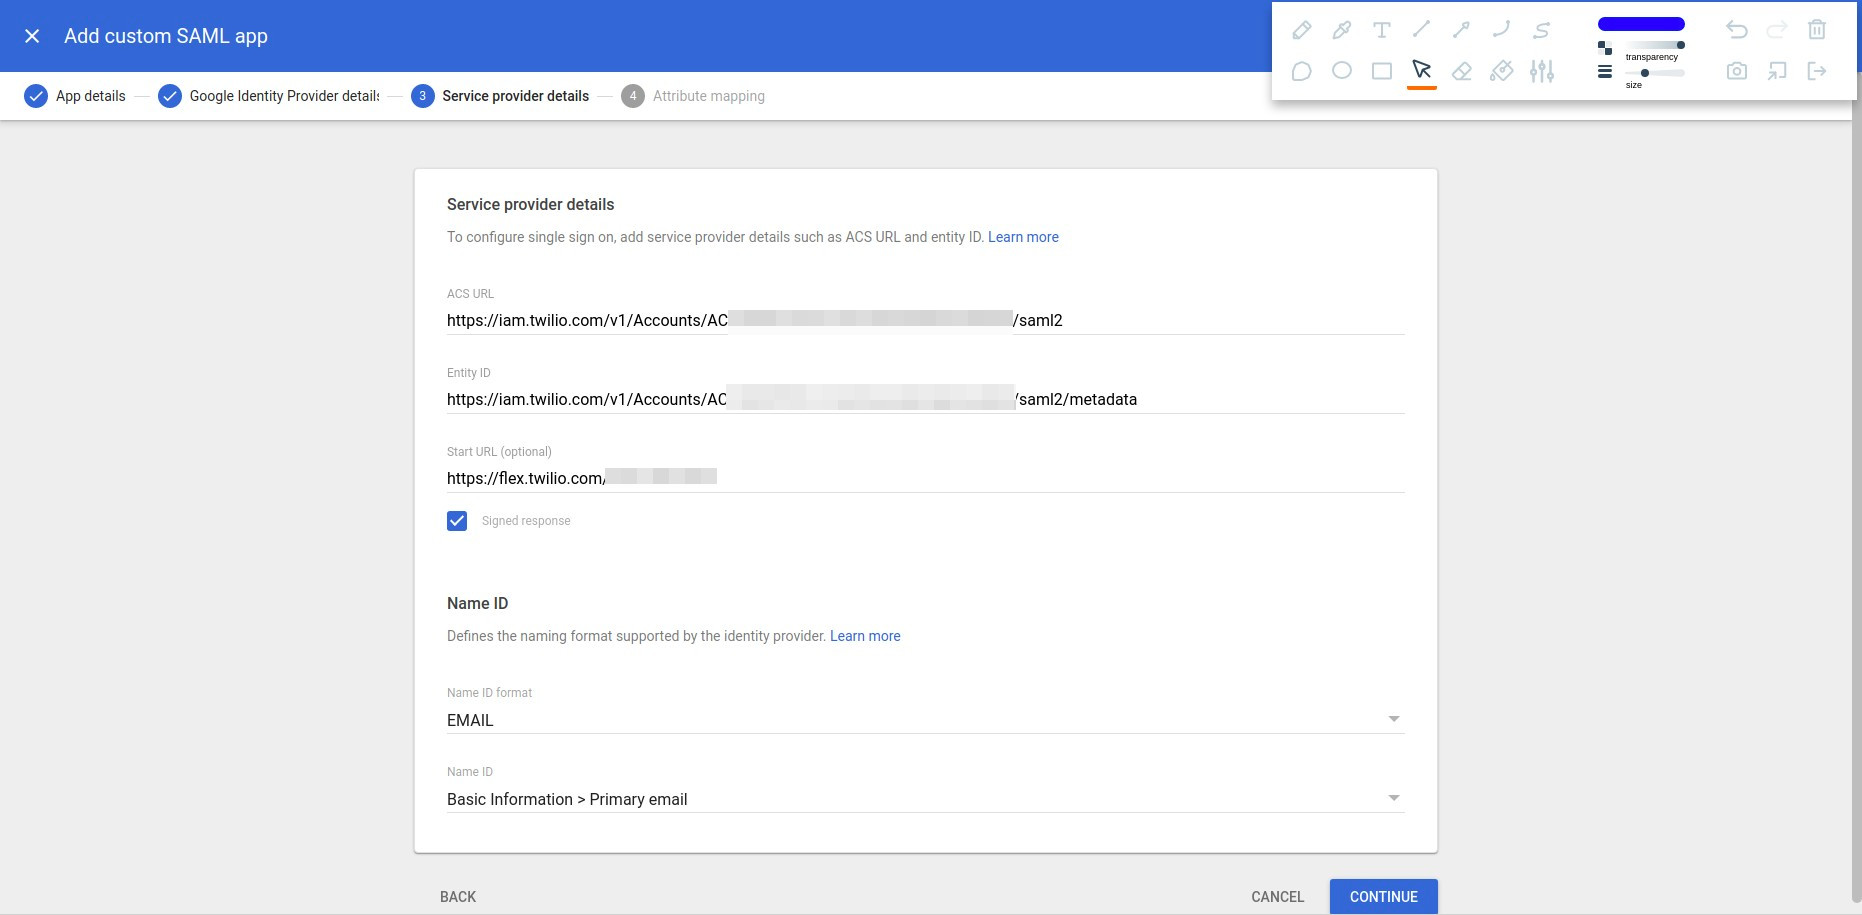
On the next step we need to enter:
- ACS URL: https://iam.twilio.com/v1/Accounts/[YOUR ACCOUNT SID]/saml2
- Entiry ID: https://iam.twilio.com/v1/Accounts/[YOUR ACCOUNT SID]/saml2/metadata
- Start URL: https://flex.twilio.com/<your-runtime-domain>
This URL is found on the Twilio Console > Flex > Manage > Single Sign On - Signed response: checked!
- Name ID format: EMAIL
- Name ID: Basic Information & Primary Email
Once done, click Continue.
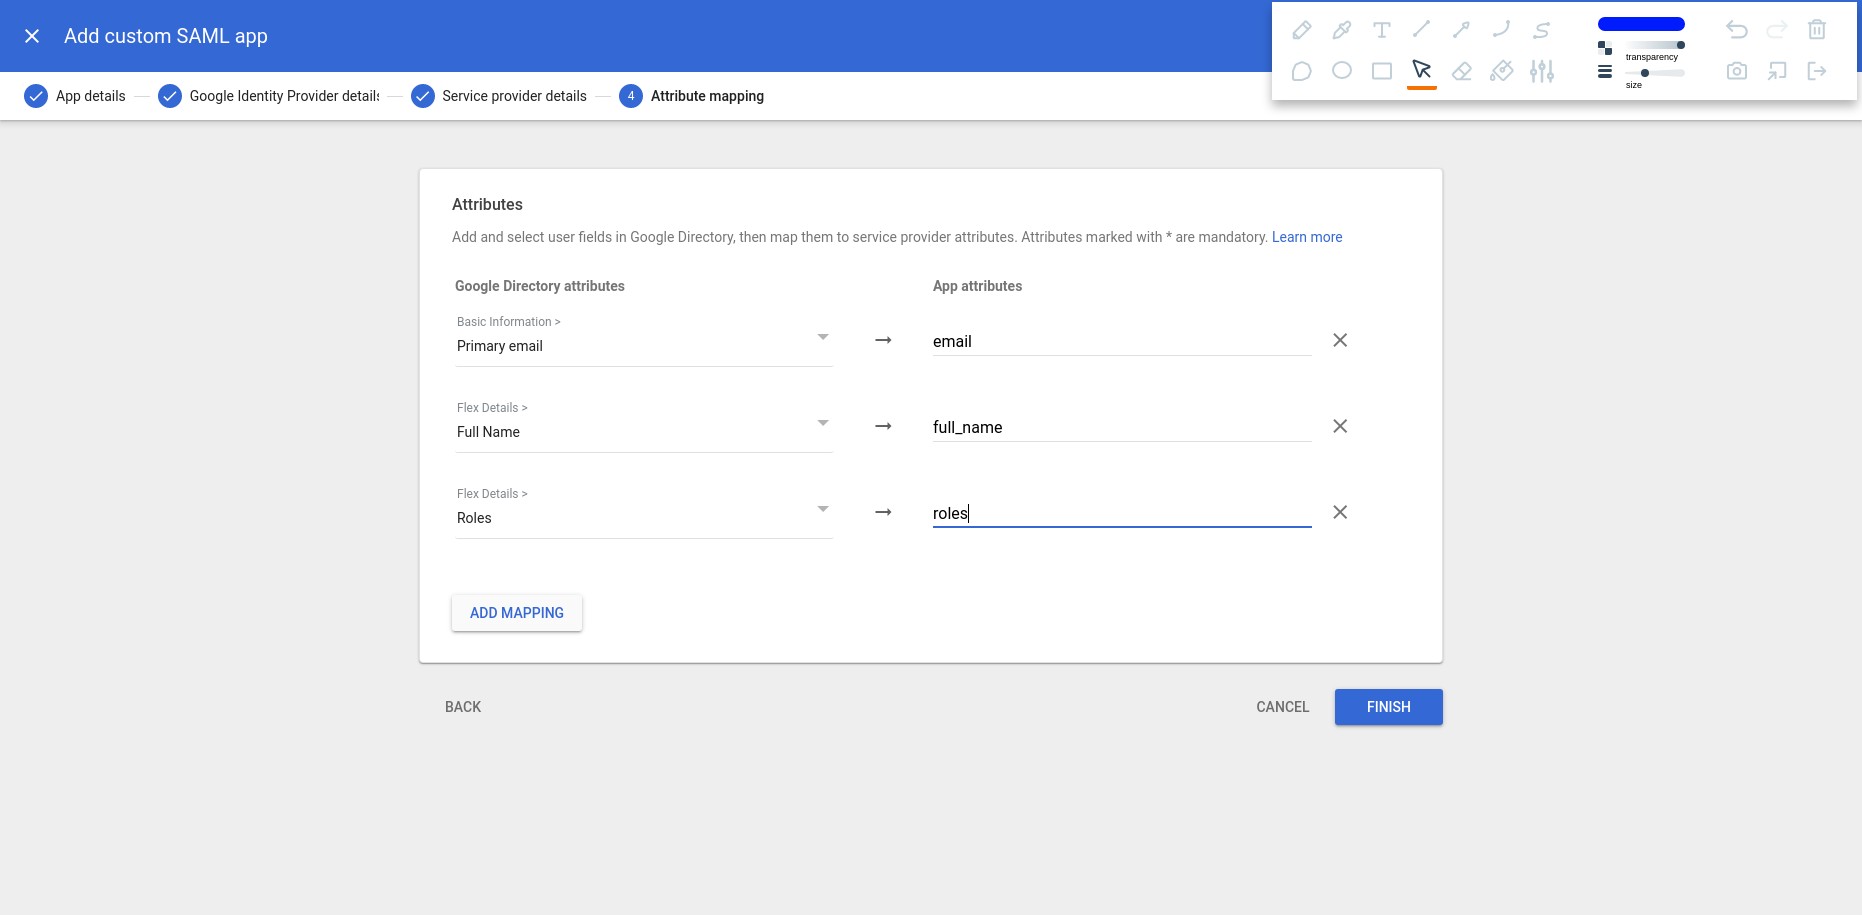
For the attribute mappings we need to map 3 attributes:
- Basic Information > Primary Email: email
- Flex Details > Full Name: full_name
- Flex Details > Roles: roles
Click Continue.
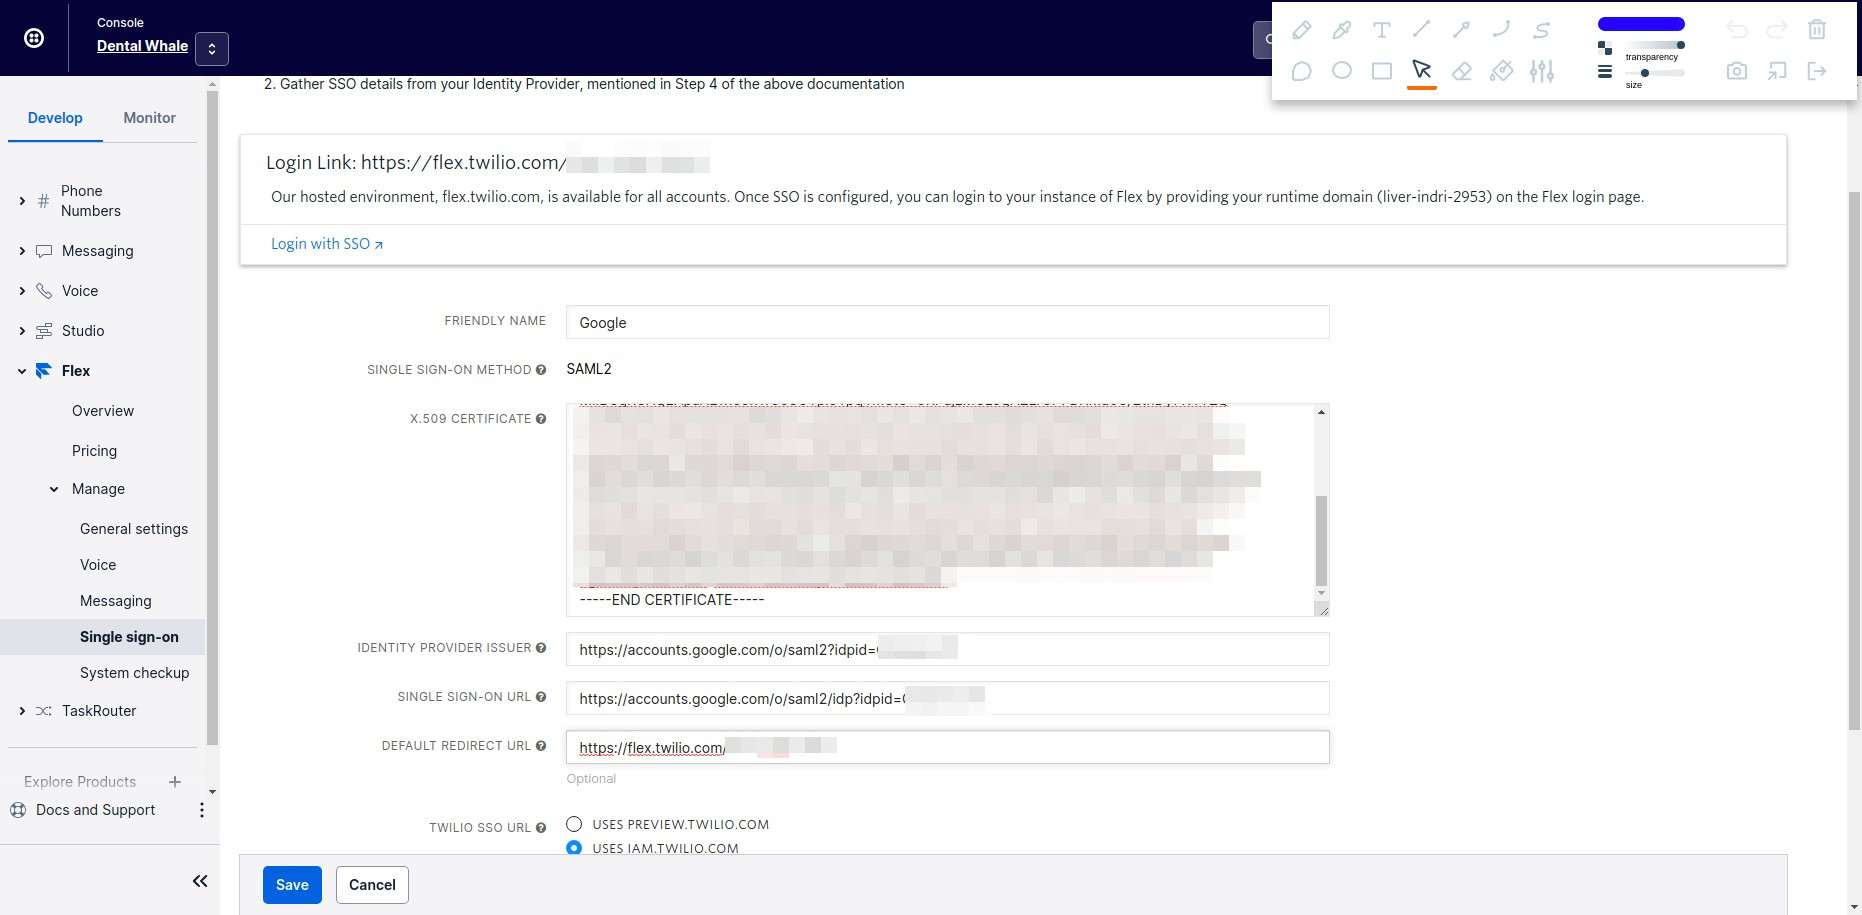
Now we need to navigate to the Twilio console and configure Twilio’s side of things. Go to Twilio console > Flex > Manage > Single Sign On
- Friendly Name: Google
- X.509 CERTIFICATE: the certificate we copied before
- IDENTITY PROVIDER ISSUER: Entity ID we copied from Google before
- SINGLE SIGN-ON URL: SSO Url we copied from Google before
- DEFAULT REDIRECT URL: Twilio Flex URL
When done click Save.
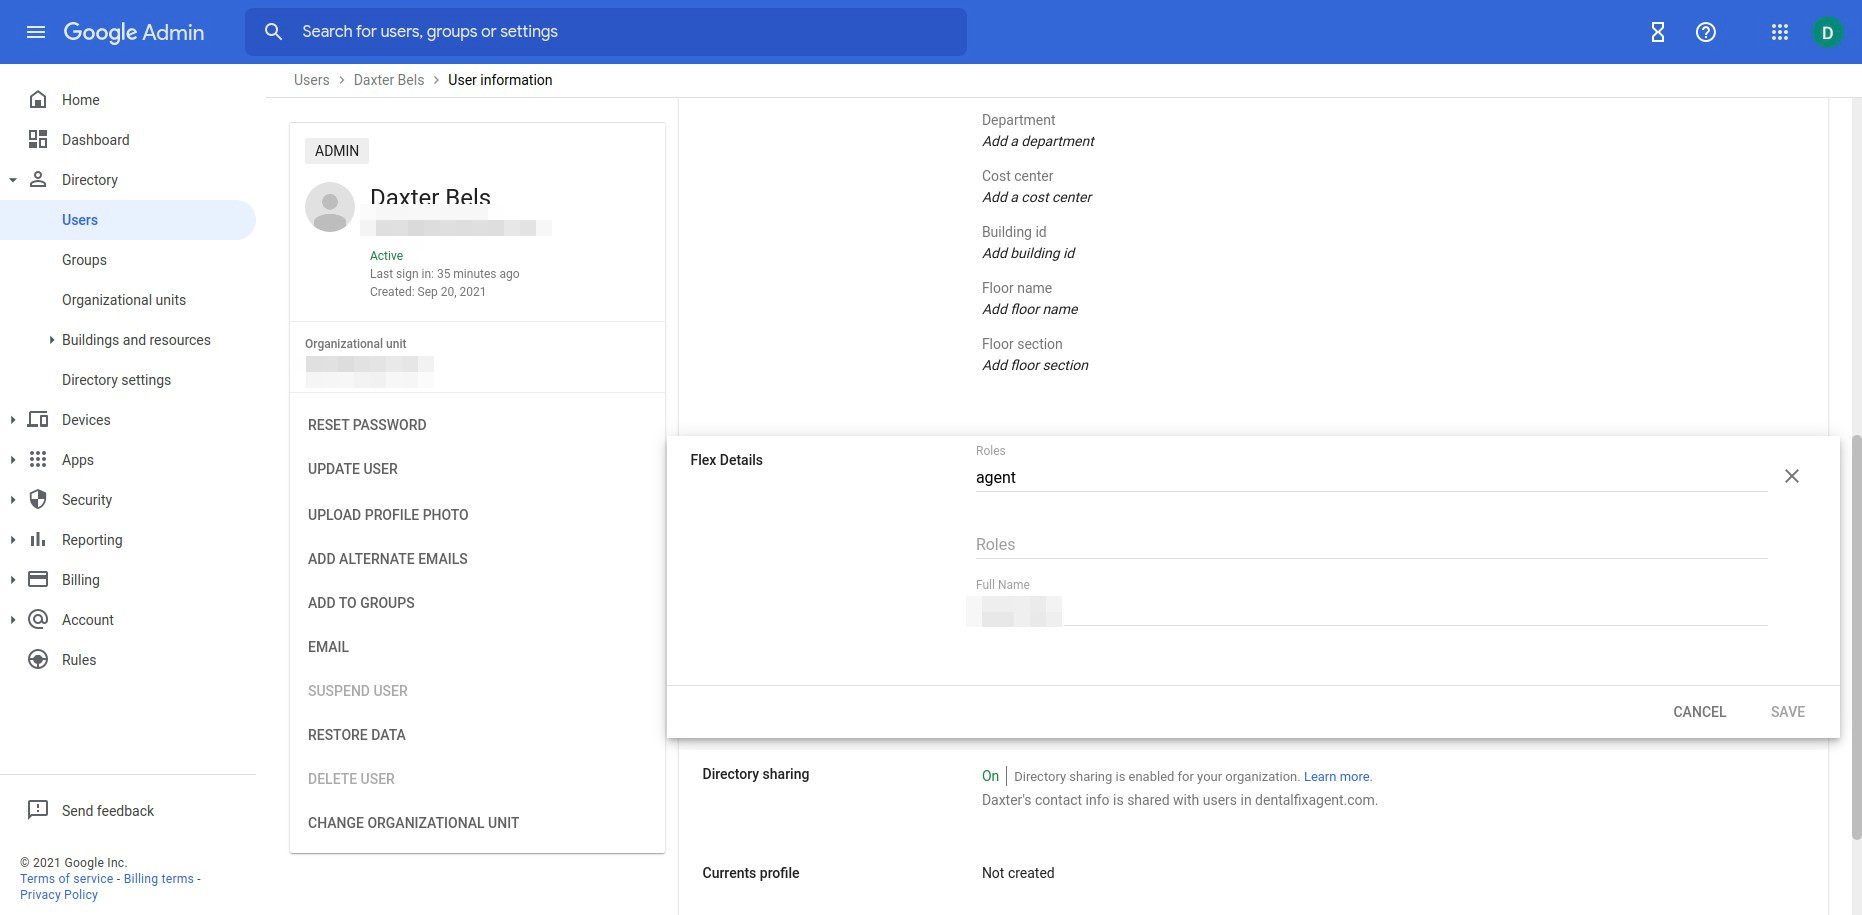
Now to configure the agents in Google! In the Google Admin console go to Directory > Users > [Click on a user] > User Information
Under Flex Details you can add roles which will be used to determine what they see in Twilio:
- admin
- supervisor
- agent
For full name this will be the displayed agent name.
Click Save when done.
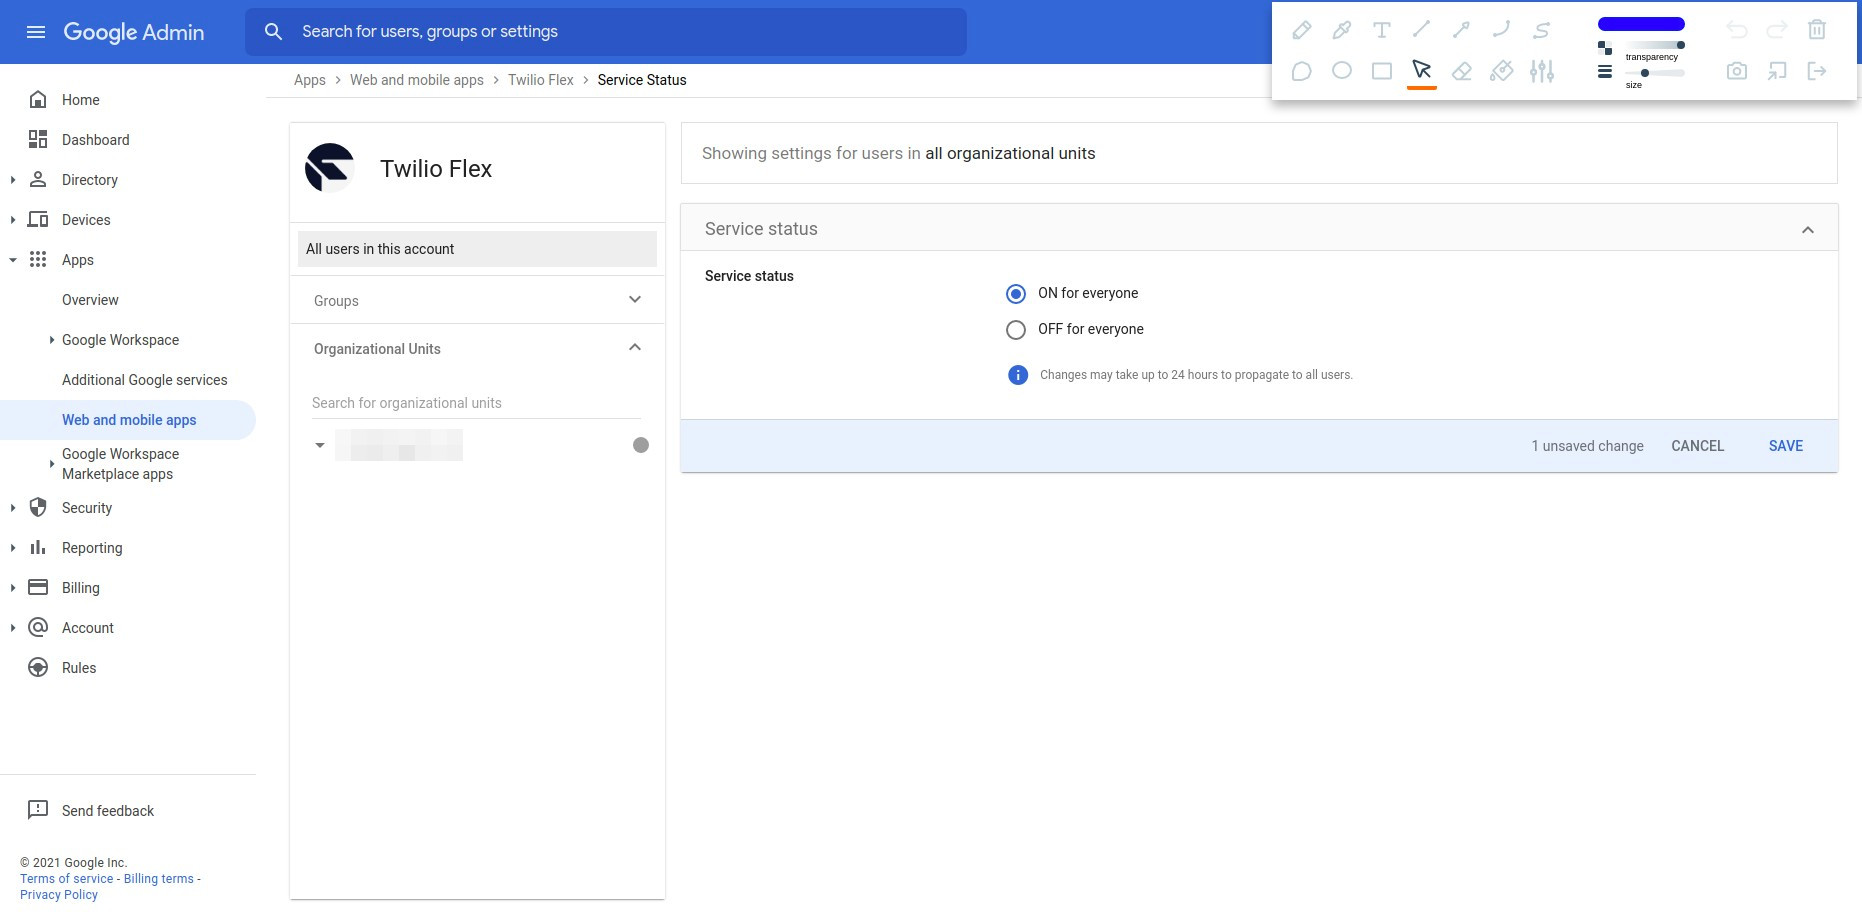
Now that we have at least one user with the Flex details filled in, is time to enable the SAML app for the users on Google’s side of the configuration. In the Google Admin console, navigate to Apps > Web and Mobile Apps > [Click on Flex App]. Expand User Access and click on On for Everybody. Hit save.
To test all you have to do is open the Single Sign On link which looks something like this: https://flex.twilio.com/<your-runtime-domain>. Then you should be prompted to login with Google! Follow the very common login you usually do for your gmail and you should be inside of Flex. Creating users and adding the Flex details should be how you manage agents from now on!