Before we get into the how to increase system storage on an EC2 instance, let me provide you with this cool terminal command to find out how much memory is available in a Linux instance.
df -hThe output should give you the size of the disk, how much is used and how much you have available
ubuntu@ip-172-31-0-18:~$ df -h
Filesystem      Size  Used Avail Use% Mounted on
udev            1.9G     0  1.9G   0% /dev
tmpfs           394M  868K  393M   1% /run
/dev/xvda1       59G   19G   40G  32% / <-----------------------------------The disk is 50G, we used 19G and we have 40G available
tmpfs           2.0G     0  2.0G   0% /dev/shm
tmpfs           5.0M     0  5.0M   0% /run/lock
tmpfs           2.0G     0  2.0G   0% /sys/fs/cgroup
/dev/loop0       34M   34M     0 100% /snap/amazon-ssm-agent/3552
/dev/loop2       56M   56M     0 100% /snap/core18/2074
/dev/loop4       68M   68M     0 100% /snap/lxd/20326
/dev/loop7       33M   33M     0 100% /snap/snapd/12704
/dev/loop5       25M   25M     0 100% /snap/amazon-ssm-agent/4046
/dev/loop8       71M   71M     0 100% /snap/lxd/21029
/dev/loop3       56M   56M     0 100% /snap/core18/2128
/dev/loop1       33M   33M     0 100% /snap/snapd/12883
tmpfs           394M     0  394M   0% /run/user/1000
To increase storage on an EC2 Instance follow the following steps.
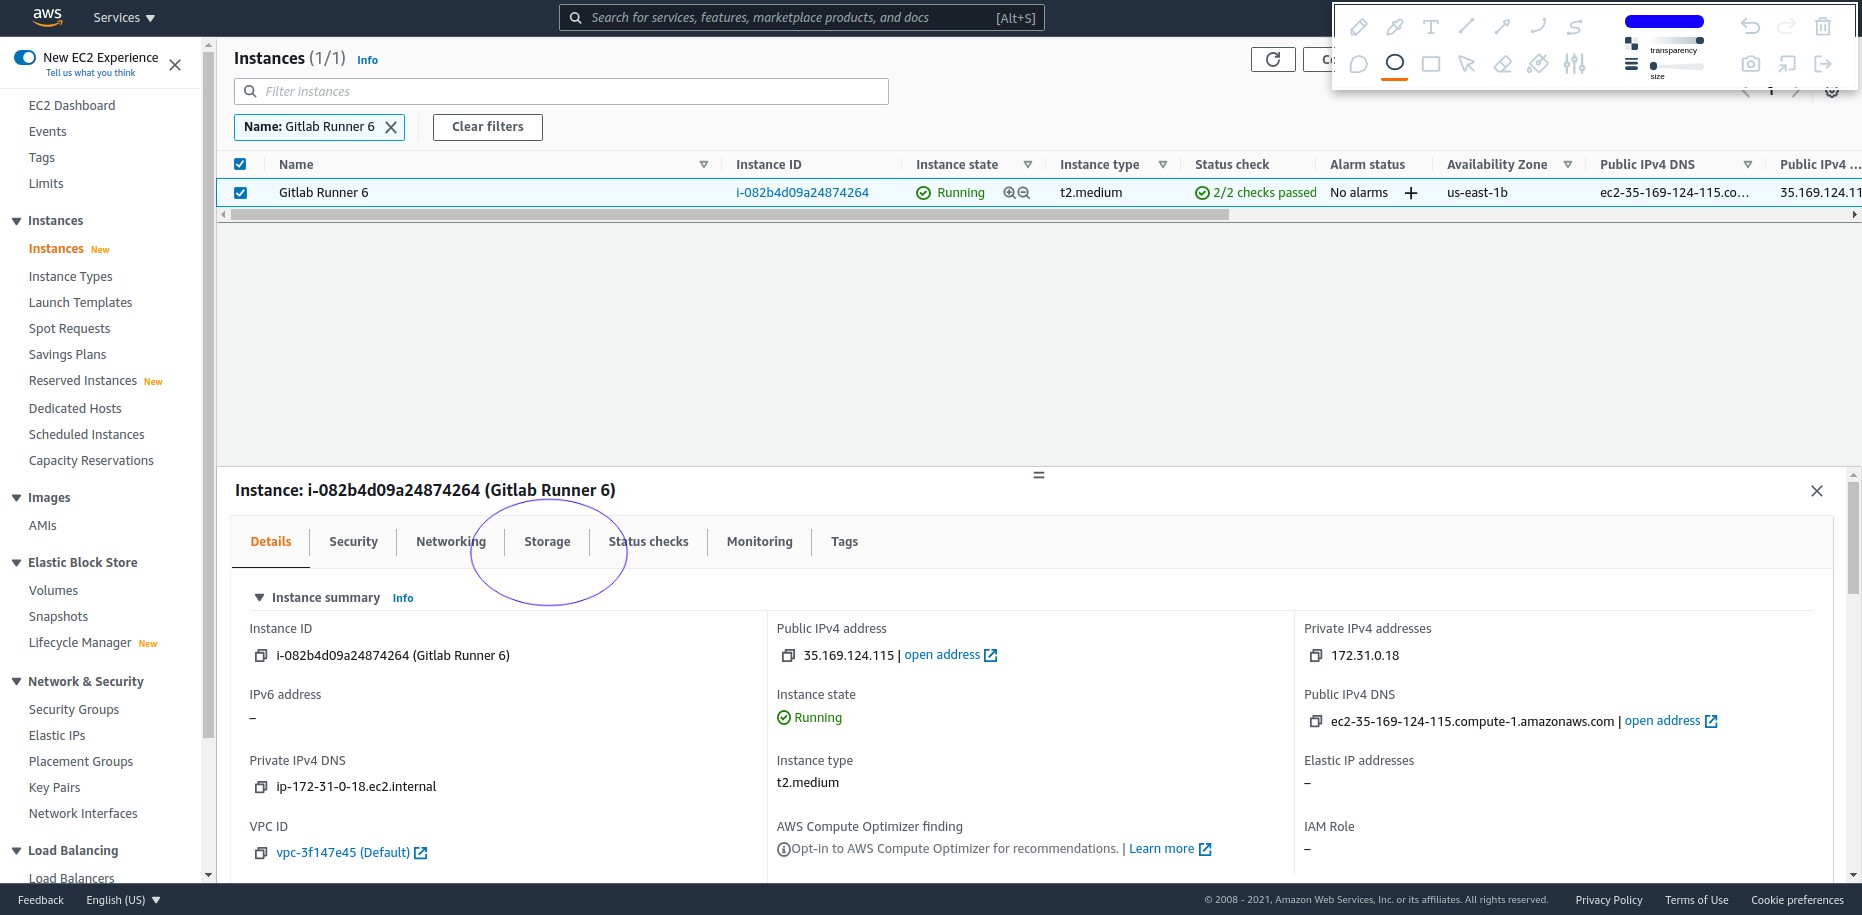
Go into the EC2 console and find the instance that you are trying to increase the size of.
Click on the Storage tab
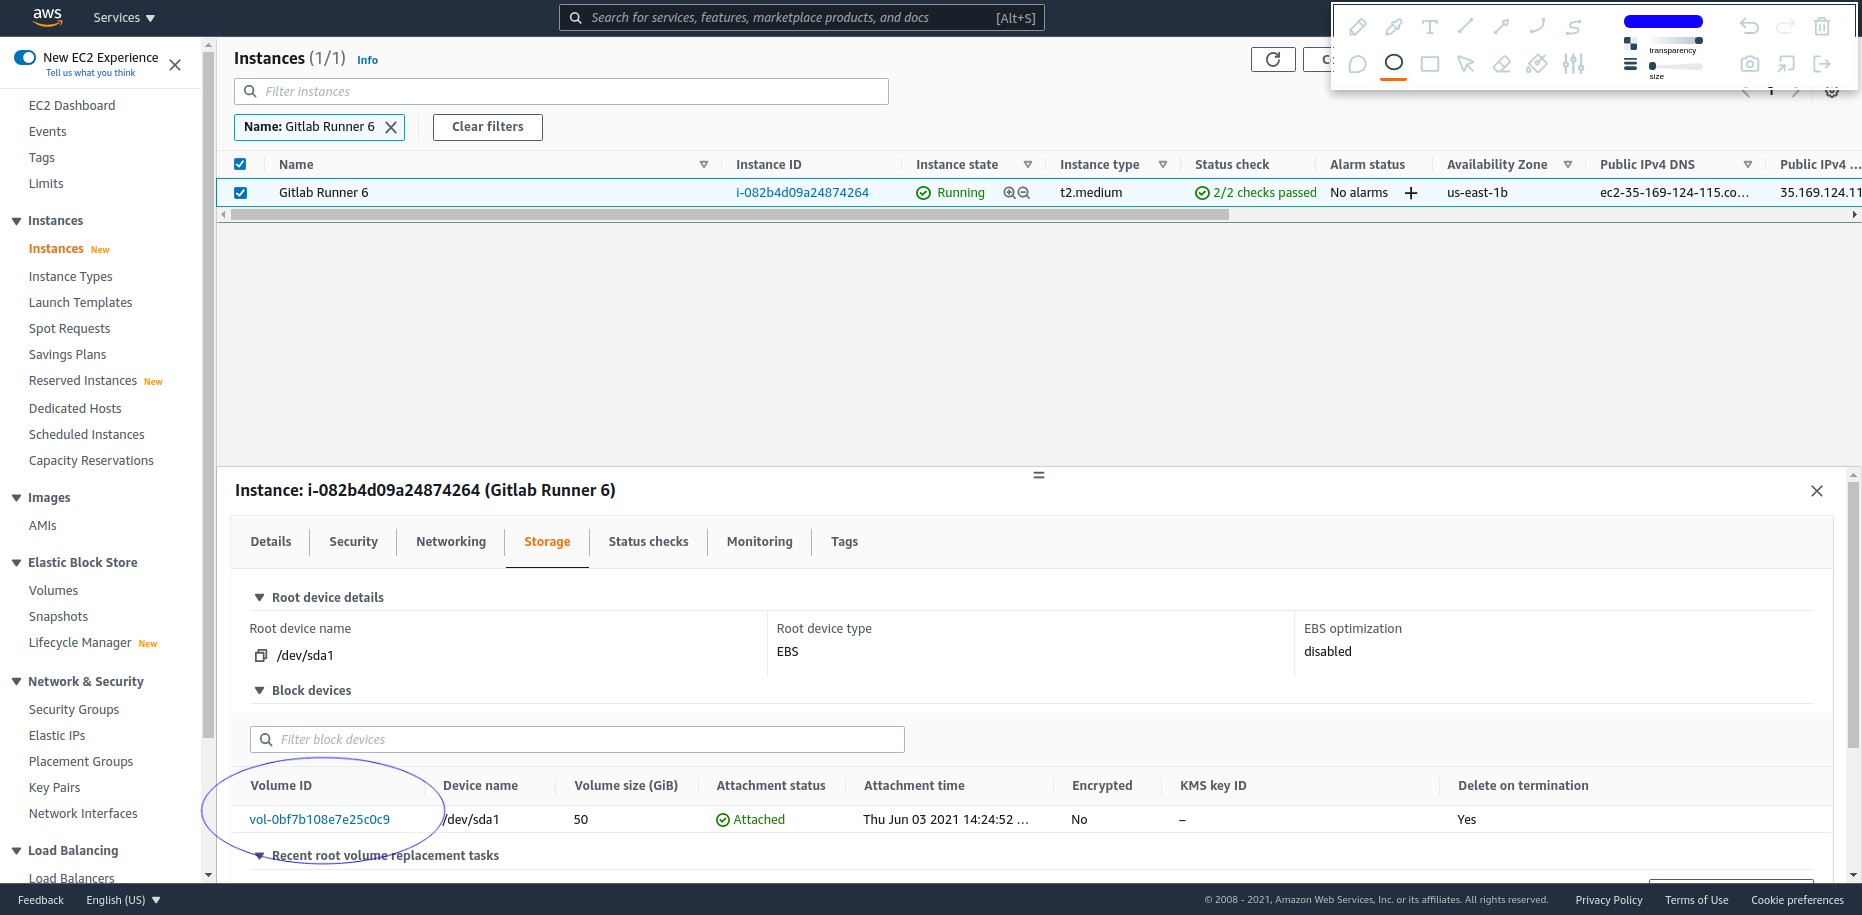
Click on the volume for the instance
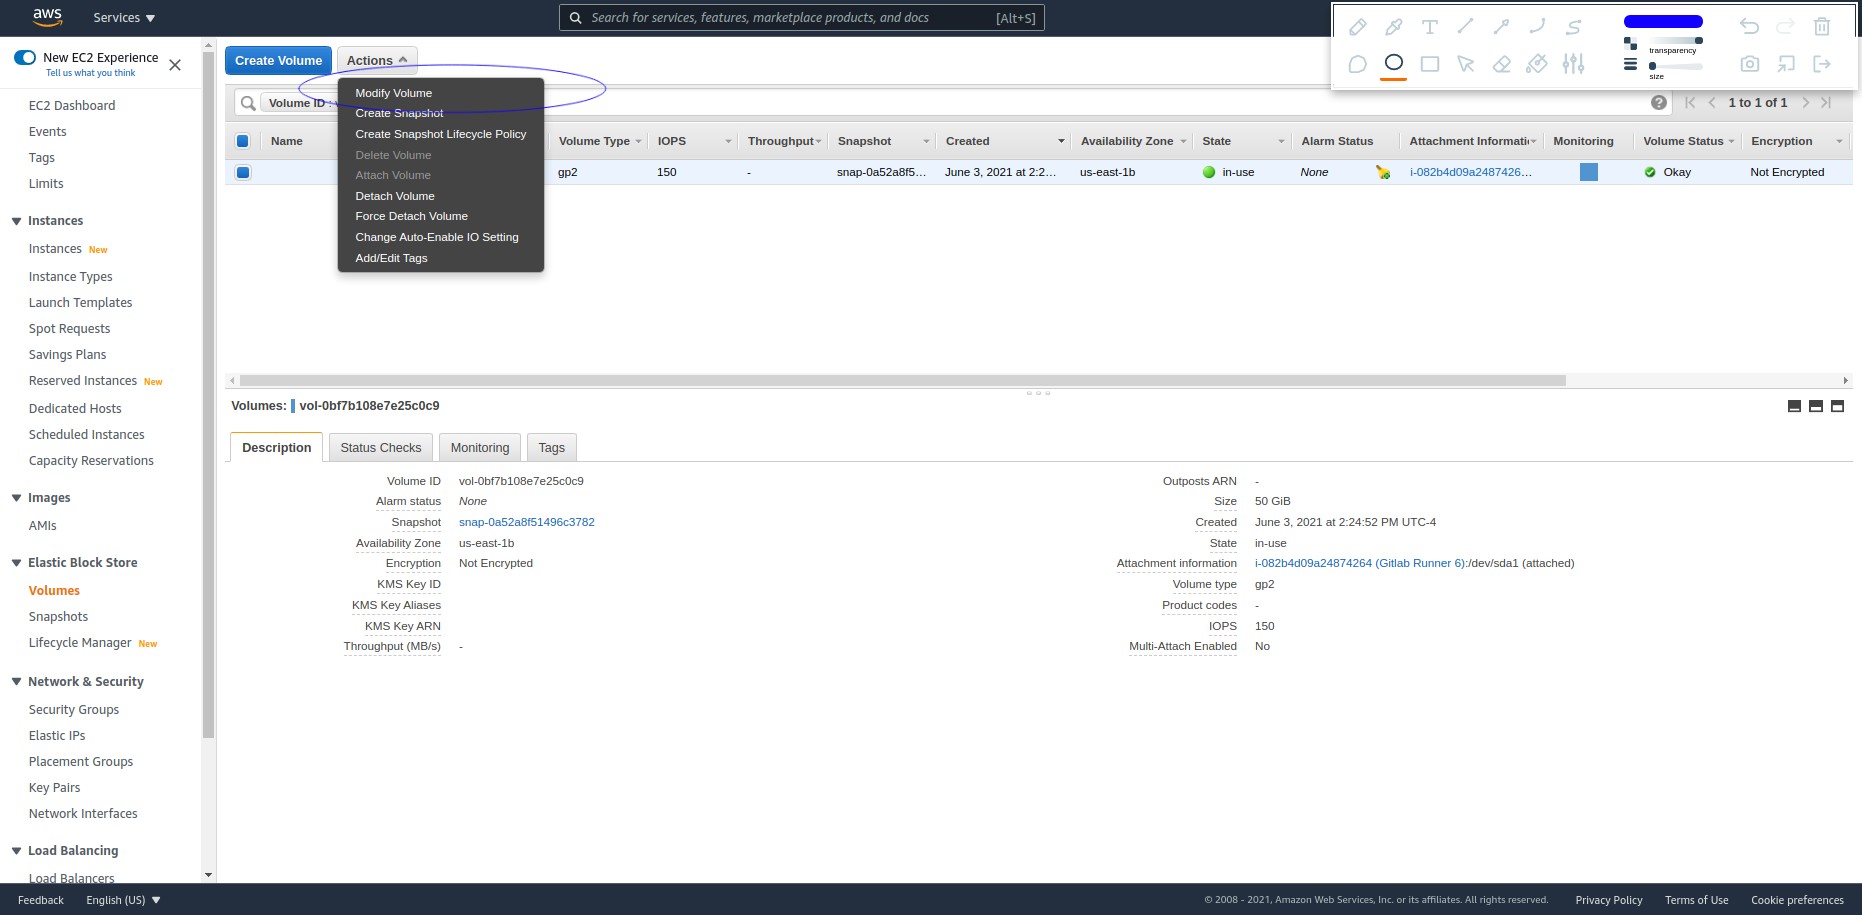
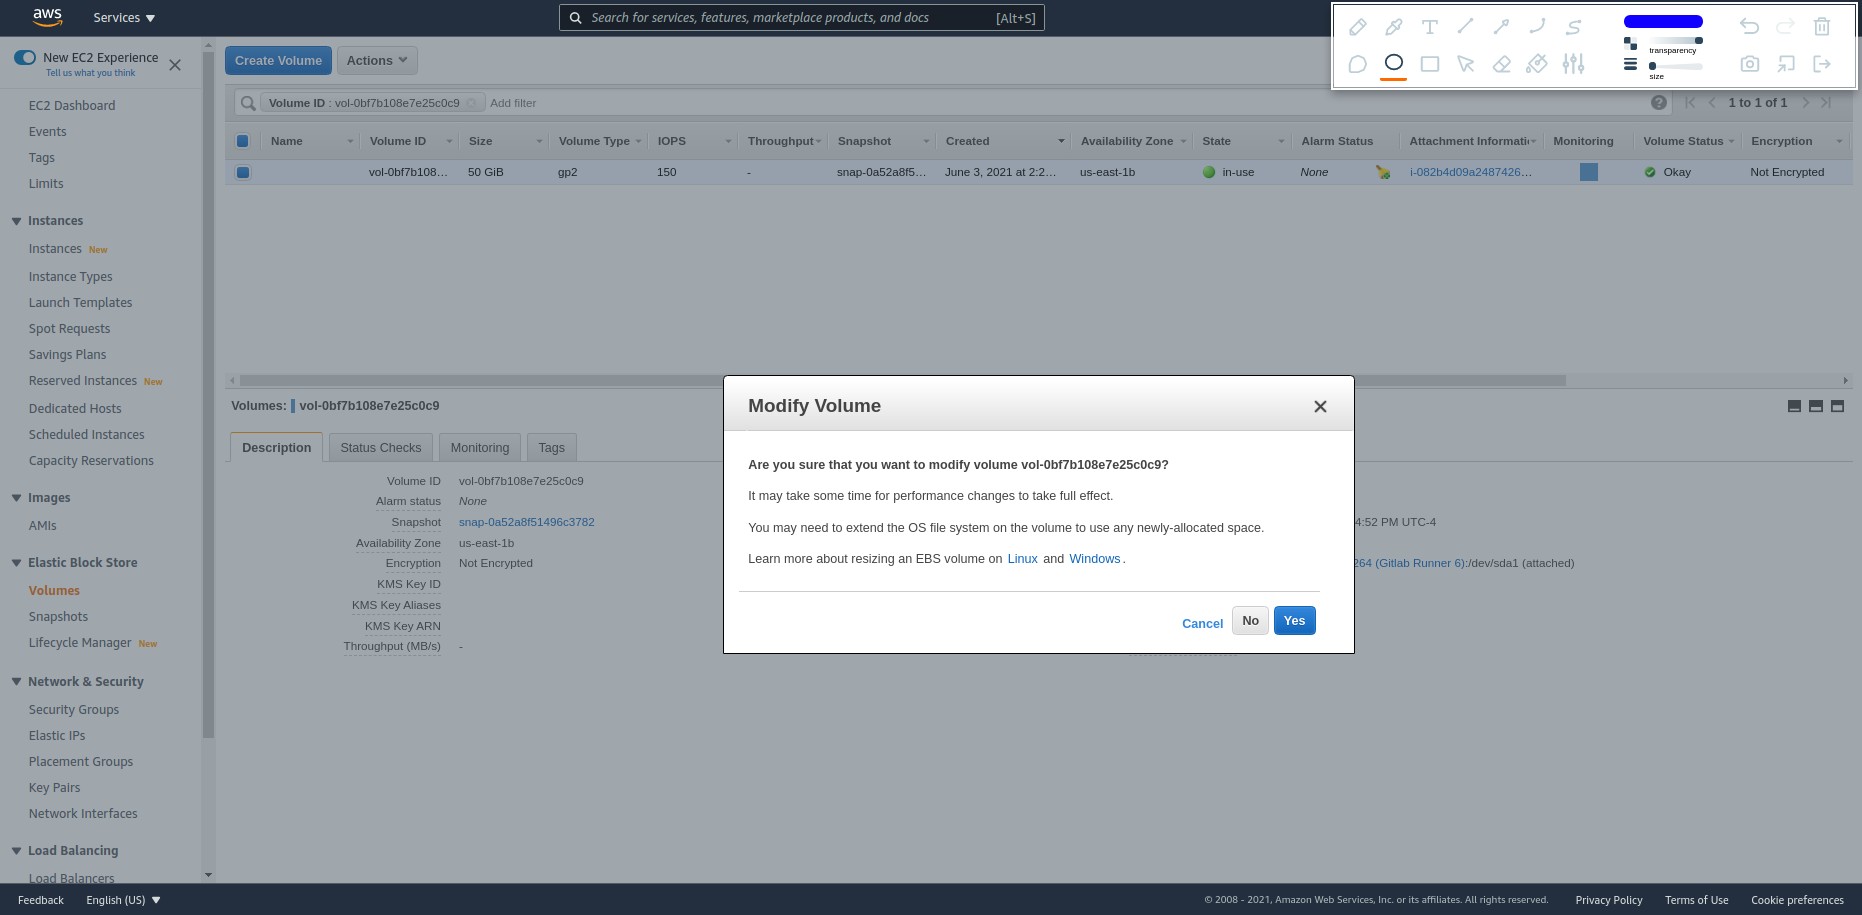
With the correct volume selected, click on the Actions > Modify Volume
Change the size of the volume to a bigger size and click Modify.
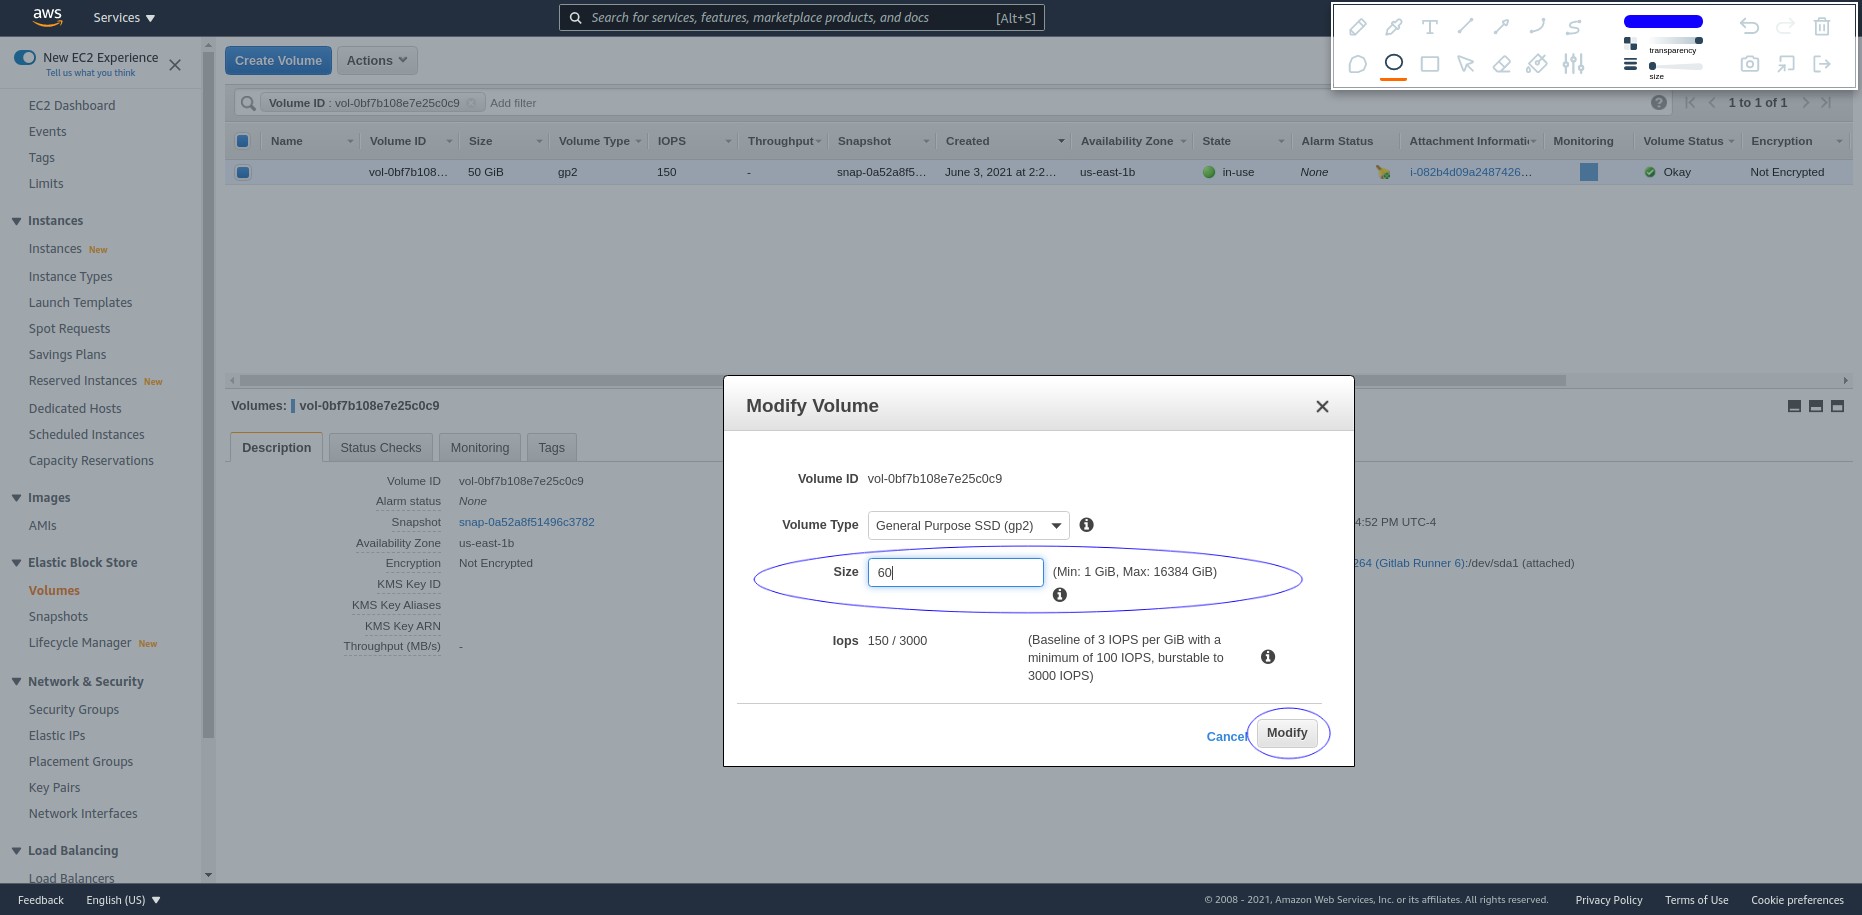
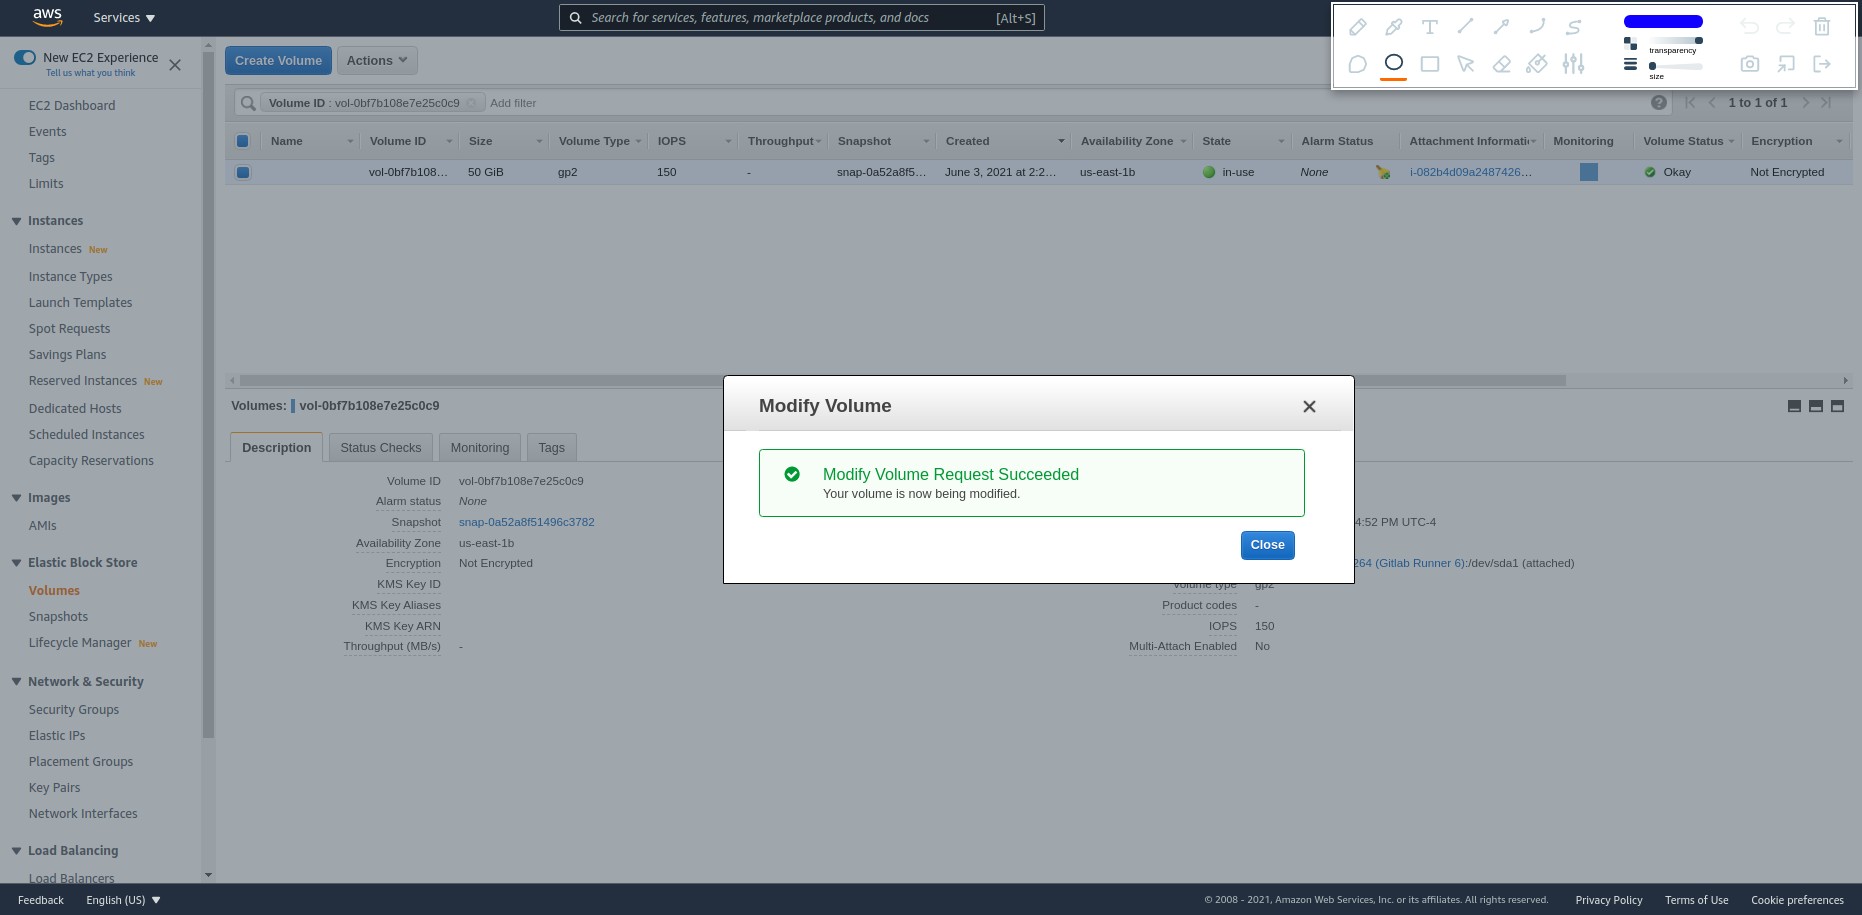
Confirm the changes and click yes
Close the dialog
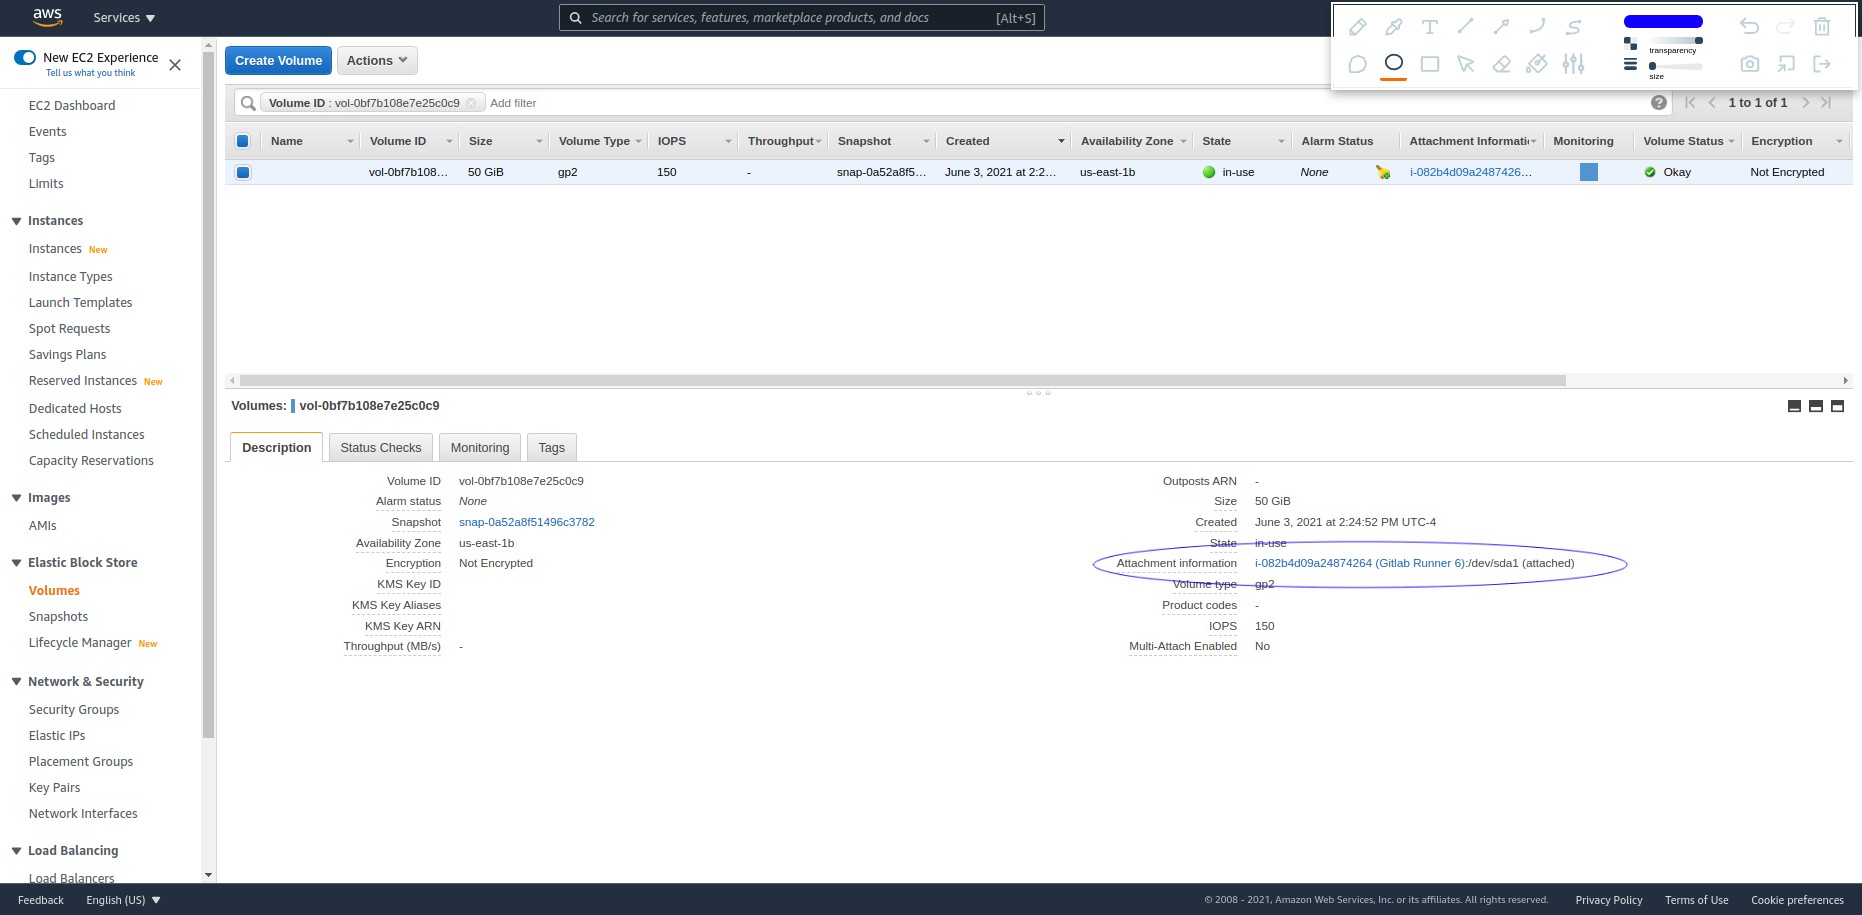
Click on the instance id to go back to the instance
With the instance selected, click on connect on the buttons at the top right corner
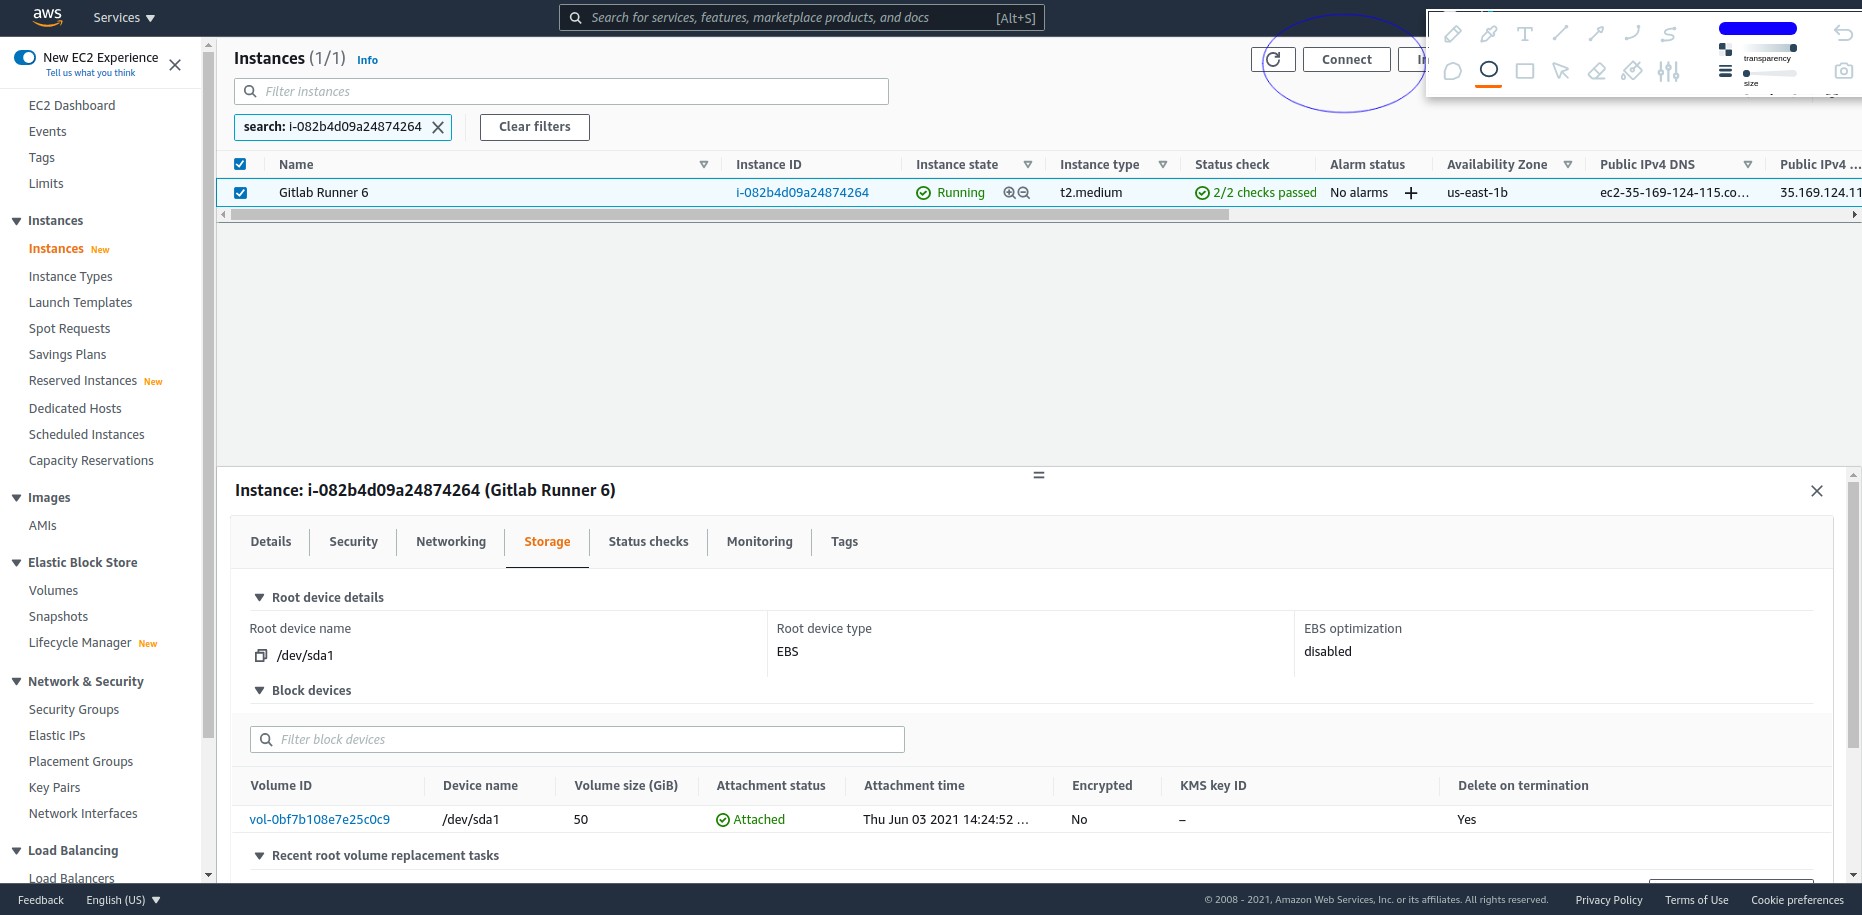
Copy the command to connect to the instance through your terminal.
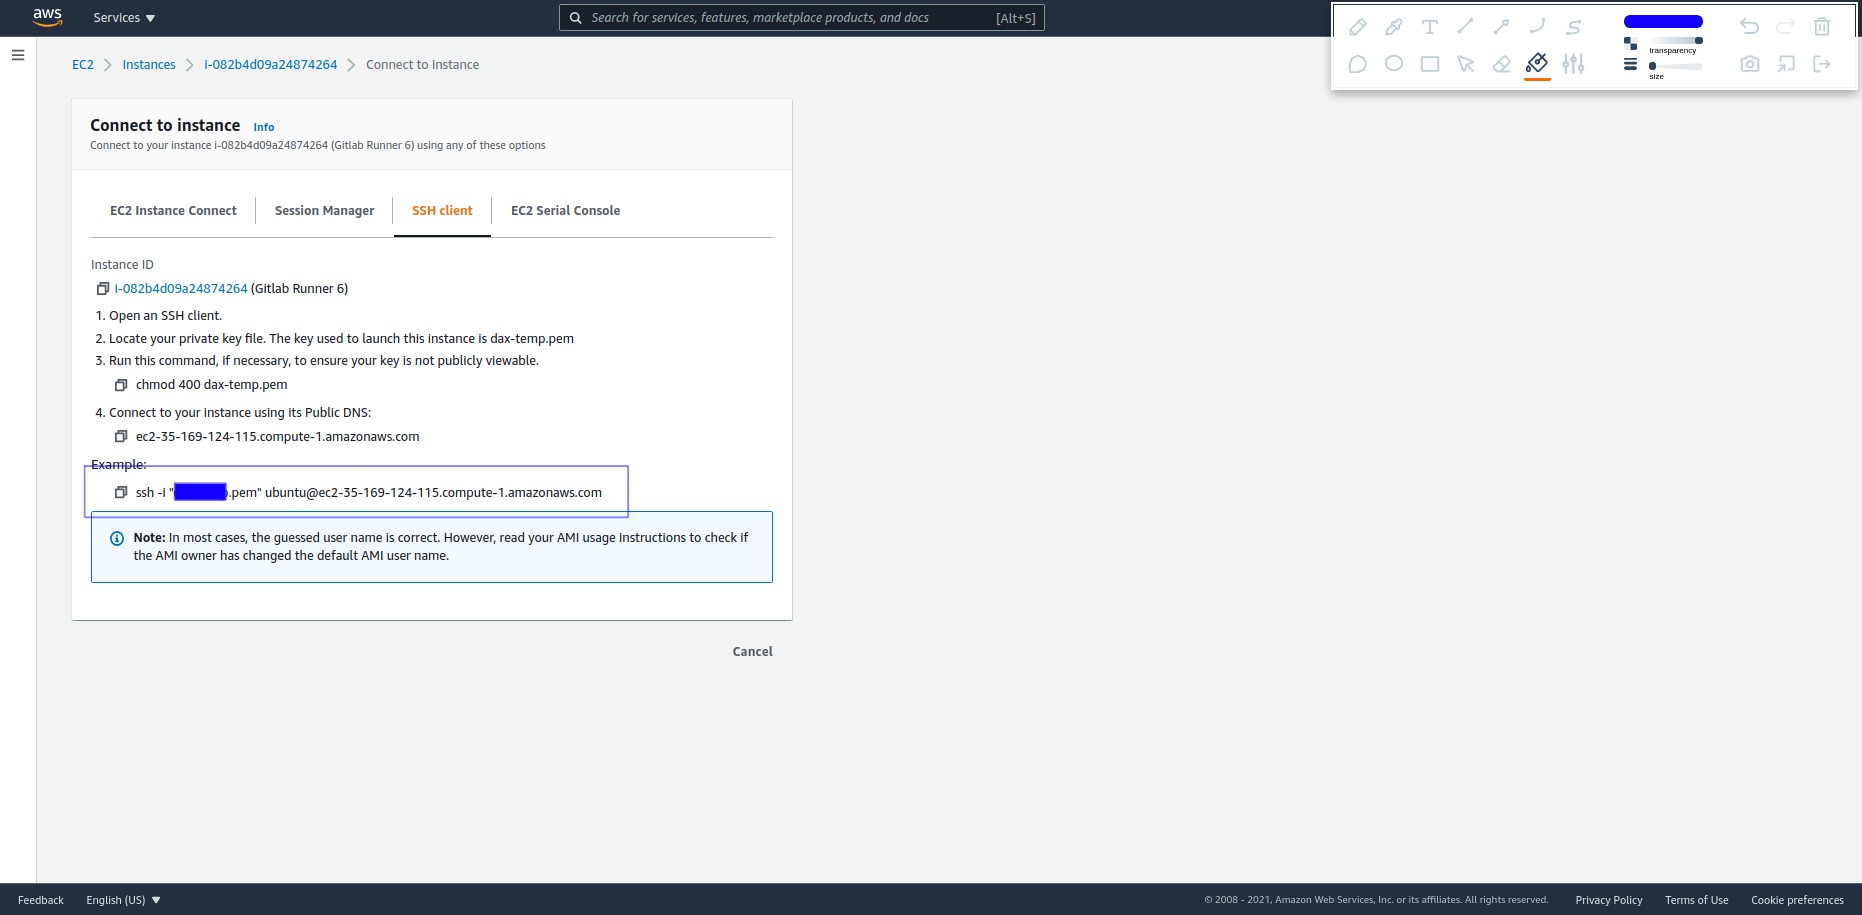
Open your terminal, and navigate to the folder where your pem key is stored. In this example is ~/.ssh
cd ~/.sshThen paste the command you copied to connect to the instance and run it
ssh -i "YOUR_PEM_KEY.pem" YOUR_INSTANCE_NAME@YOUR_INSTANCE_ADDRESSIf it is your first time connecting to the instance you may be prompted to confirm the connection, answer yes
Are you sure you want to continue connecting (yes/no/[fingerprint])? yesRun the following command
lsblkThis should give you a list of volumes in your instance. In this example notice the last two entries. In my example the instance was originally 50Gb, and I increased it to 60Gb. The last two rows, the xvda has a size of 60Gb, but the only partition has a size of 50Gb. In order for our instance to use the newly allocated space, we need to increase the only partition to 60Gb.
ubuntu@ip-172-31-0-18:~$ lsblk
NAME    MAJ:MIN RM  SIZE RO TYPE MOUNTPOINT
loop0     7:0    0 33.3M  1 loop /snap/amazon-ssm-agent/3552
loop1     7:1    0 32.3M  1 loop /snap/snapd/12883
loop2     7:2    0 55.5M  1 loop /snap/core18/2074
loop3     7:3    0 55.4M  1 loop /snap/core18/2128
loop4     7:4    0 67.6M  1 loop /snap/lxd/20326
loop5     7:5    0   25M  1 loop /snap/amazon-ssm-agent/4046
loop6     7:6    0 32.3M  1 loop
loop7     7:7    0 32.3M  1 loop /snap/snapd/12704
loop8     7:8    0 70.3M  1 loop /snap/lxd/21029
xvda    202:0    0   60G  0 disk <------------ Size of the disk
└─xvda1 202:1    0   50G  0 part / <---------- Needs to be increased to 60 for our instance to be able to use the newly allocated space
Since we are trying to increase the partition xvda1 on 202:1, the number after the 202 in my example, which is a 1 is the partition we are trying to increase in disk xvda. So the command looks like the following: “sudo growpart DISK_ADDRESS PARTITION_#”. So in our example it looks like the following.
sudo growpart /dev/xvda 1Running the above command should yield a result like so.
sudo growpart /dev/xvda 1
CHANGED: partition=1 start=2048 old: size=104855519 end=104857567 new: size=125827039 end=125829087
If you run the “lsblk” command we run in the previous step you are going to see that the partition has been resized to the total value of the disk:
ubuntu@ip-172-31-0-18:~$ lsblk
NAME    MAJ:MIN RM  SIZE RO TYPE MOUNTPOINT
loop0     7:0    0 33.3M  1 loop /snap/amazon-ssm-agent/3552
loop1     7:1    0 32.3M  1 loop /snap/snapd/12883
loop2     7:2    0 55.5M  1 loop /snap/core18/2074
loop3     7:3    0 55.4M  1 loop /snap/core18/2128
loop4     7:4    0 67.6M  1 loop /snap/lxd/20326
loop5     7:5    0   25M  1 loop /snap/amazon-ssm-agent/4046
loop6     7:6    0 32.3M  1 loop
loop7     7:7    0 32.3M  1 loop /snap/snapd/12704
loop8     7:8    0 70.3M  1 loop /snap/lxd/21029
xvda    202:0    0   60G  0 disk  <---------------- Size of the disk
└─xvda1 202:1    0   60G  0 part / <--------------- Was 50 now it is 60 matching the size of the disk
The last step is to increase the file system itself. You can do so with the following command: “sudo resize2fs PARTITION_ADDRESS”
sudo resize2fs /dev/xvda1Should return an output like so:
ubuntu@ip-172-31-0-18:~$ sudo resize2fs /dev/xvda1
resize2fs 1.45.5 (07-Jan-2020)
Filesystem at /dev/xvda1 is mounted on /; on-line resizing required
old_desc_blocks = 7, new_desc_blocks = 8
The filesystem on /dev/xvda1 is now 15728379 (4k) blocks long
If you want to check that everything worked correctly and your available system storage through the terminal run the following command:
df -hThe output should give you the size of the disk, how much is used and how much you have available
ubuntu@ip-172-31-0-18:~$ df -h
Filesystem      Size  Used Avail Use% Mounted on
udev            1.9G     0  1.9G   0% /dev
tmpfs           394M  868K  393M   1% /run
/dev/xvda1       59G   19G   40G  32% / <-----------------------------------The disk is 50G, we used 19G and we have 40G available
tmpfs           2.0G     0  2.0G   0% /dev/shm
tmpfs           5.0M     0  5.0M   0% /run/lock
tmpfs           2.0G     0  2.0G   0% /sys/fs/cgroup
/dev/loop0       34M   34M     0 100% /snap/amazon-ssm-agent/3552
/dev/loop2       56M   56M     0 100% /snap/core18/2074
/dev/loop4       68M   68M     0 100% /snap/lxd/20326
/dev/loop7       33M   33M     0 100% /snap/snapd/12704
/dev/loop5       25M   25M     0 100% /snap/amazon-ssm-agent/4046
/dev/loop8       71M   71M     0 100% /snap/lxd/21029
/dev/loop3       56M   56M     0 100% /snap/core18/2128
/dev/loop1       33M   33M     0 100% /snap/snapd/12883
tmpfs           394M     0  394M   0% /run/user/1000
The article title says it will demonstrate how to increase the memory but you are increasing the storage. Memory and storage are not the same.
You are right! I changed the instances where it said memory and changed it for storage. Sorry about the confusion. I believe to change the RAM memory you need to change the instance itself, and there is no way around that in AWS.